
video tutorials for social media
Getting Started with AI-Powered SubtitleBee
Video content creation is one of the most popular trends all over the world. Whether it is for personal usage or to promote or market a brand, videos are vital to influence the targeted customers.
But if you want to enhance the quality and accessibility of your videos, you should consider adding subtitles to them. The best part is that you can do that within minutes with AI-powered SubtitleBee, which helps you automatically add subtitles.
This is a comprehensive starter guide to SubtitleBee to help you set up your account and navigate its user-friendly interface to access numerous features.
Introducing SubtitleBee
SubtitleBee is a powerful AI-powered video subtitle generator and audio transcription software. It is capable of subtitling, translating, and transcribing content with an accuracy of 95% or more. SubtitleBee has a special emphasis on ensuring accuracy with its AI algorithms to ensure you don’t end up editing or correcting your subtitles manually and waste your time.
Other than the subtitling feature, SubtitleBee also has several customization options to enhance your subtitles and captions. You can modify the font styles, colors, background details, and the position of the subtitles.
Moreover, a “Supertitles” feature is also available to help you add text over your videos and create head titles. Once you are done adding and editing the subtitles, you can even crop the video and export it in high-quality for different formats.
Don’t worry if you don’t fully understand how to use all these features yet, as we’ll be discussing all of them one by one in detail.
Table of Contents
- Setting up an Account on SubtitleBee
- Part 1: How to Add Subtitles to Your Video with SubtitleBee?
- Part 2: How to Edit Subtitles in SubtitleBee?
- Part 3: How to Translate Subtitles in SubtitleBee?
- Part 4: How to Add Overlay Text to Videos (Supertitles) in SubtitleBee?
- Part 5: How to Export Videos in SubtitleBee?
- Part 6: How to Transcribe Audios using SubtitleBee?
- Conclusion
- FAQs
Setting up an Account on SubtitleBee
First of all, you have to create an account on SubtitleBee. Open the sign-up page of SubtitleBee and create your account by entering your email and password. Alternatively, you can also sign in with your Google account to save time.
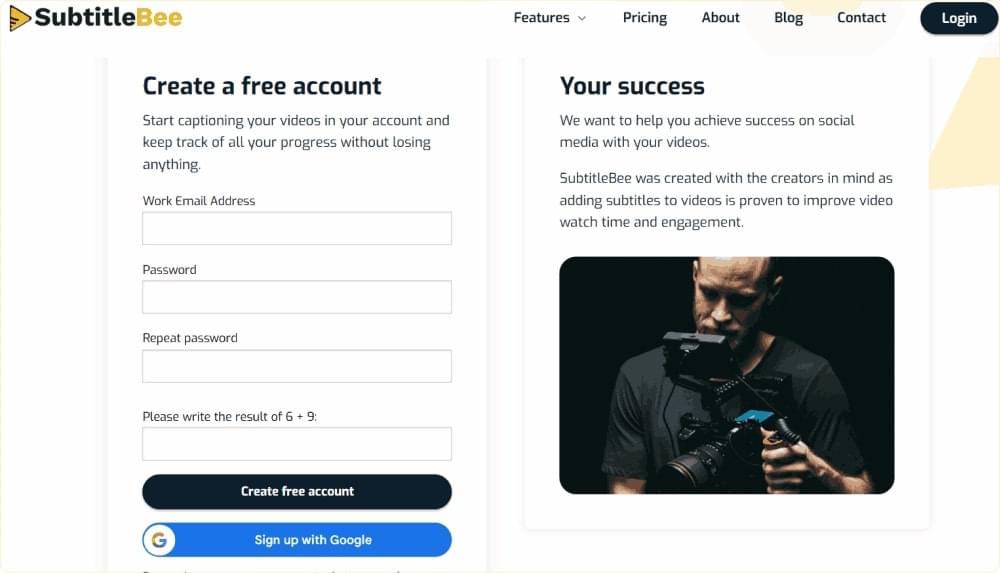
After verifying your email, log in to your account to access the SubtitleBee dashboard.
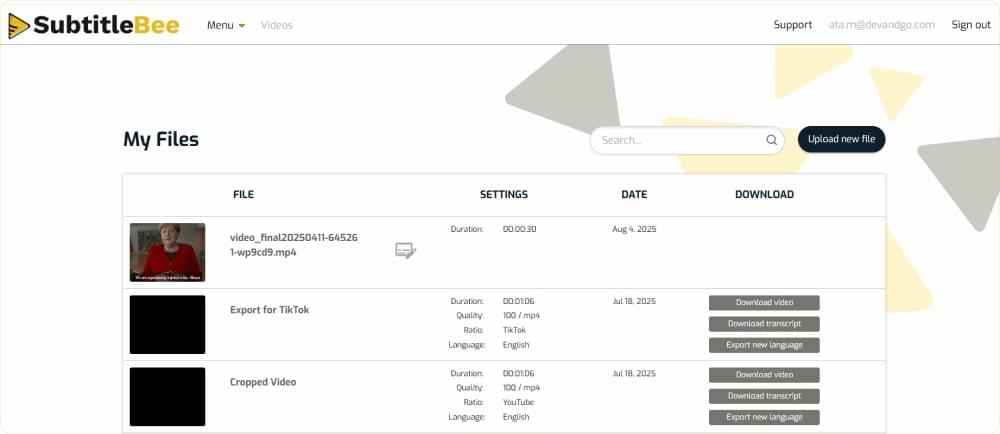
Now that you have access to SubtitleBee, you can subtitle, translate, transcribe, and crop your videos.
Part 1: How to Add Subtitles to Your Video with SubtitleBee?
Follow these quick and simple steps to add subtitles to your video with SubtitleBee:
Step 1: Upload Your File
On the dashboard, click on the Upload new file button.
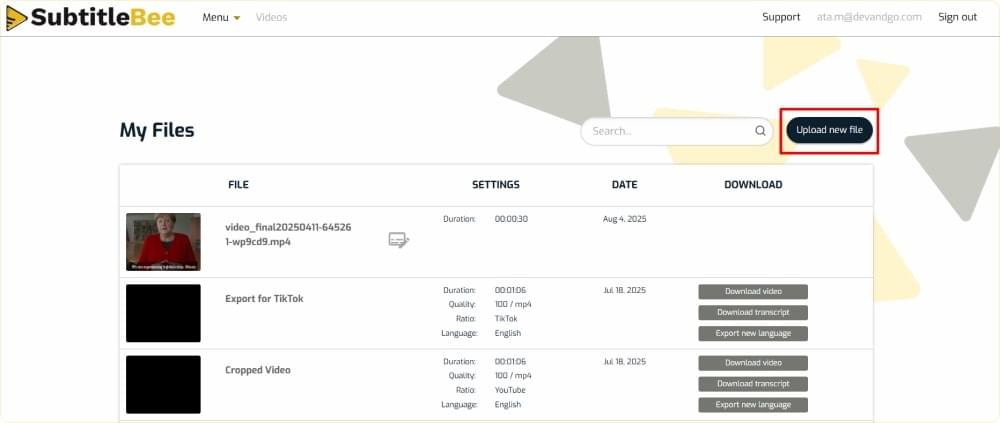
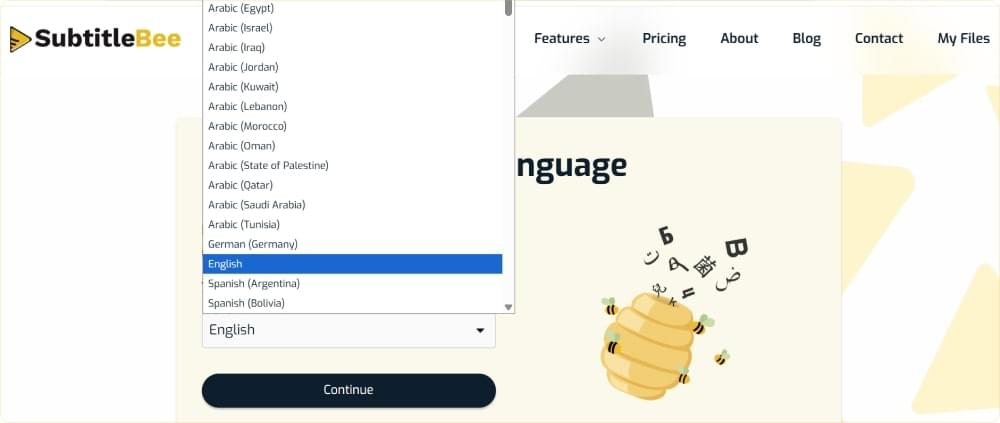
Step 2: Choose Media Language
Choose the media language of your content. Make sure you are selecting the right language, so SubtitleBee’s AI algorithm can correctly analyze and subtitle the content.
Step 3: Upload Your Video
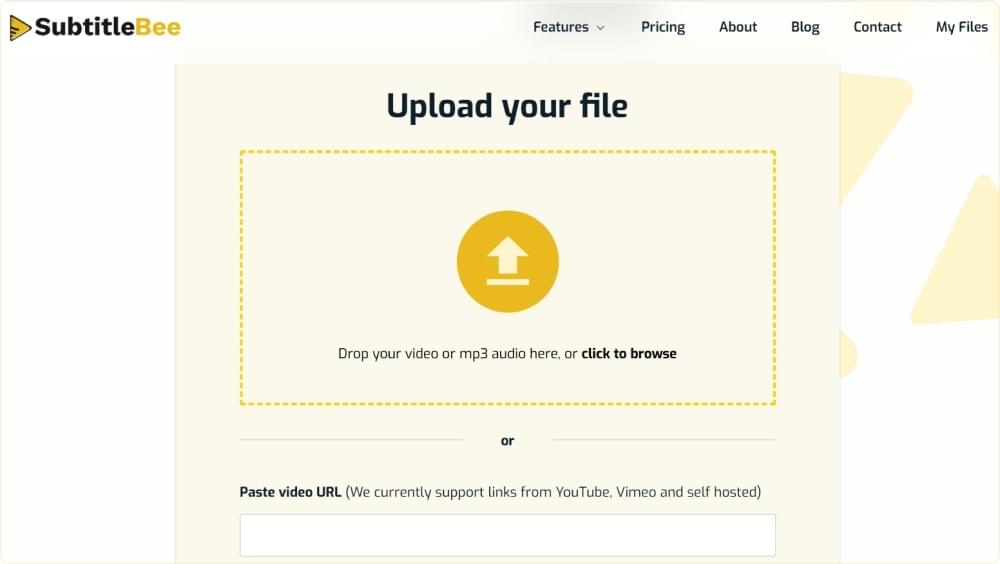
Upload your file either from your computer or paste the video URL from sites like YouTube, Vimeo, or any self-hosted platform. It is recommended that you upload a video of up to 60 minutes with a file size of up to 1 GB to get optimal results.
But even if you have a larger file, you can upload it as SubtitleBee supports a file of up to 5 GB (5000 MB).
On the other hand, the maximum duration of the video you can upload is dependent on your plan:
- Free trial: 10 minutes. (This is a way for you to try out the SubtitleBee tool for once and get familiar with its interface before upgrading to the Starter plan to download the subtitled videos.)
- Starter: 240 minutes per month
- Premium: 1050 minutes per month
- Business: Unlimited
Note: These limits refer only to the amount of credits consumed as per your usage. You can upload videos longer than the specified duration limits by using more credits at once. For example, if you upload a 40-minute video on the Starter plan, it will consume 2 credits upon export.
Step 4: Wait for SubtitleBee’s Transcription Process
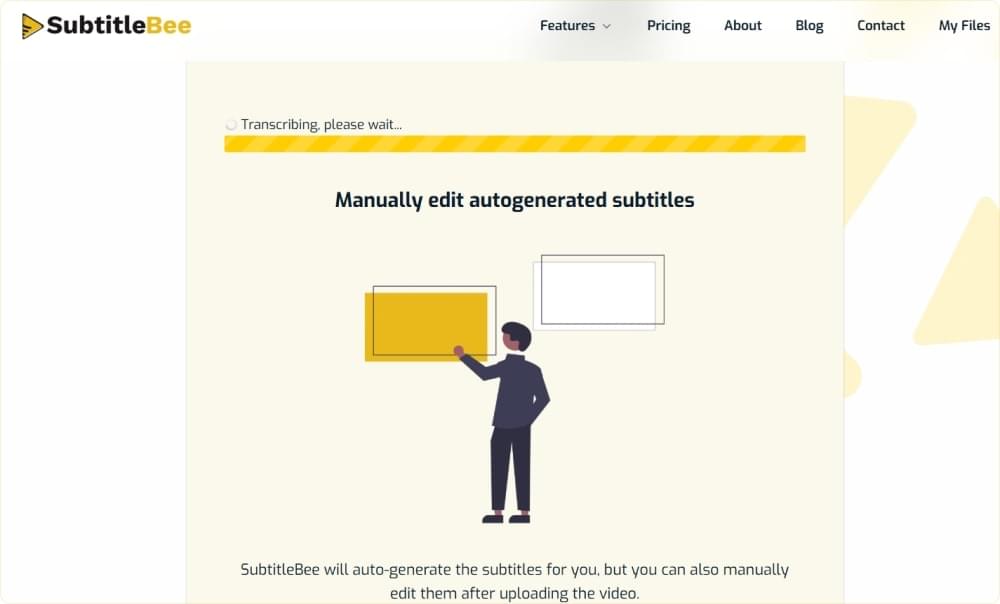
SubtitleBee is powered by efficient AI algorithms that will quickly analyze and transcribe your uploaded content and add accurate subtitles. Generally, this process takes a few minutes, but the exact time depends on your internet connection and video duration.
Step 5: Check Subtitles
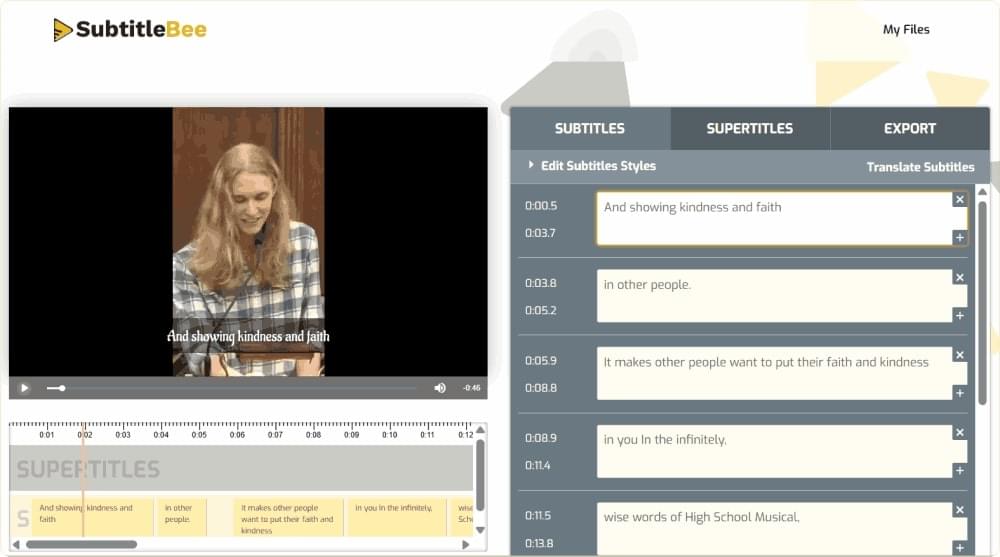
SubtitleBee will automatically add the subtitles to your video and also synchronize them. You can view them in the platform’s dashboard and make any changes, if required.
Related: Top 6 Most Efficient Auto Video Subtitles Generator Of 2025
Part 2: How to Edit Subtitles in SubtitleBee?
You can edit the generated subtitles in different ways by clicking on the Edit Subtitles Style dropdown menu.
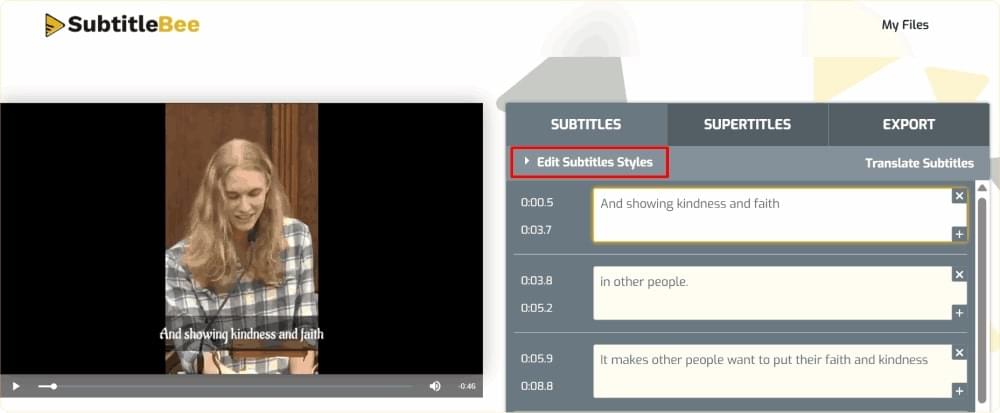
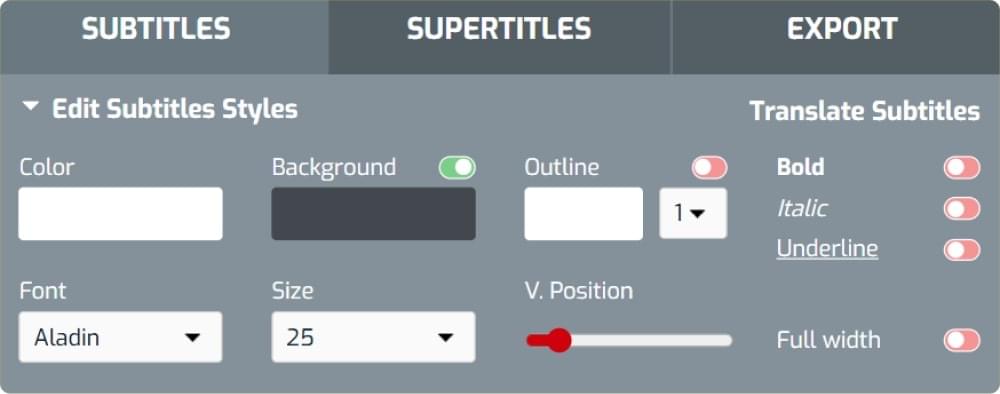
SubtitleBee has various options to edit and style your subtitles. They are:
- Change Subtitle Color: There is an integrated color picker that makes it easy for you to pick any color for your subtitles. You can use it to synchronize the subtitle color with your brand.
- Change Subtitle Font: You can select from numerous fonts to give your subtitles a personal and attractive feel. The Starter Plan includes 15 fonts, while the Premium and Business Plans offer 30+ and 350+ fonts, respectively.
- Adjust Font Size: Experiment with various subtitle font sizes between 15px and 45px so that the captions are readable by the viewers.
- Add Subtitle Background: Include a background box behind your subtitle font for better visibility.
- Add Text Outline: Outline your subtitles for better visibility.
- Change Vertical Position (V-Position): Shift your subtitles up or down on the screen by altering the V-position.
- Text Formatting Options: Emphasize your content by activating the bold, italic, or underline switches.
- Full Width Option: Switch the full-width toggle on or off to decide whether the text moves across the screen.
For example, you can change the default color and add yellow subtitles, such as this:

Also Read: Custom Subtitles for Personalized User Experiences
Part 3: How to Translate Subtitles in SubtitleBee?
Other than adding and editing subtitles, you can also translate subtitles into 120+ languages. Here’s how.
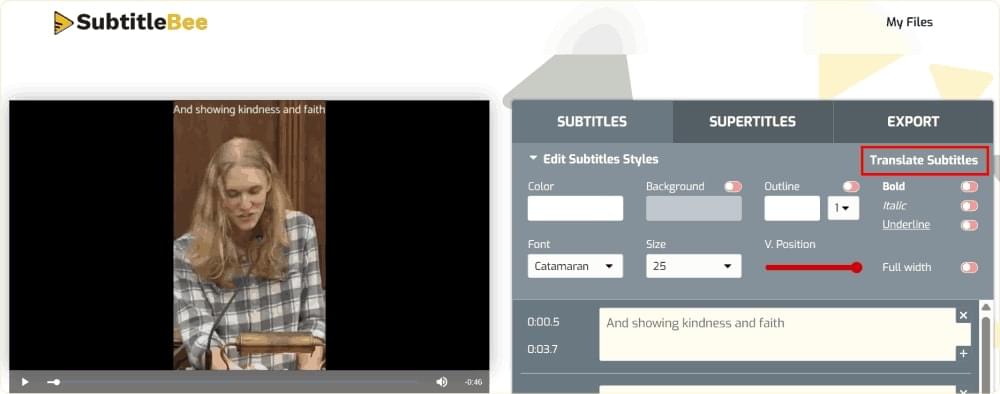
Step 1: Choose the Translate Subtitles Option
Once your video is transcribed and subtitled by SubtitleBee, click on the Translate Subtitles option from the dashboard.
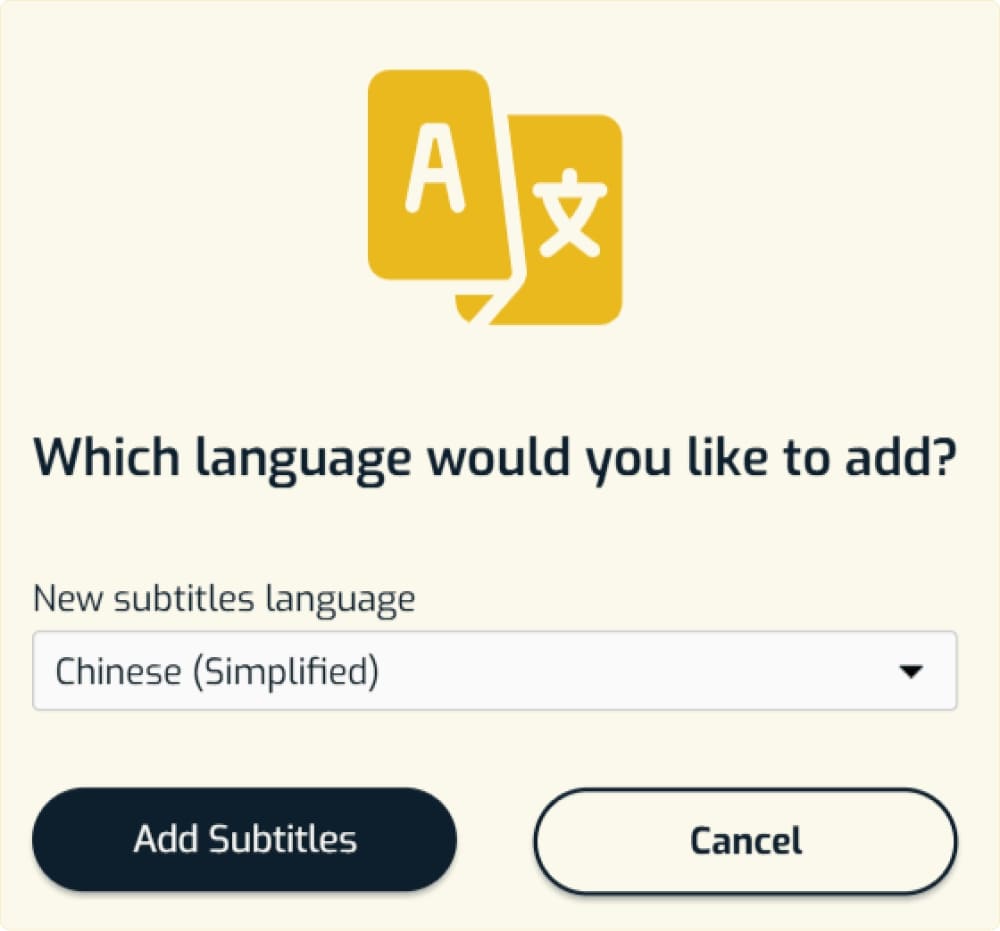
Step 2: Choose the Language for Translated Subtitles
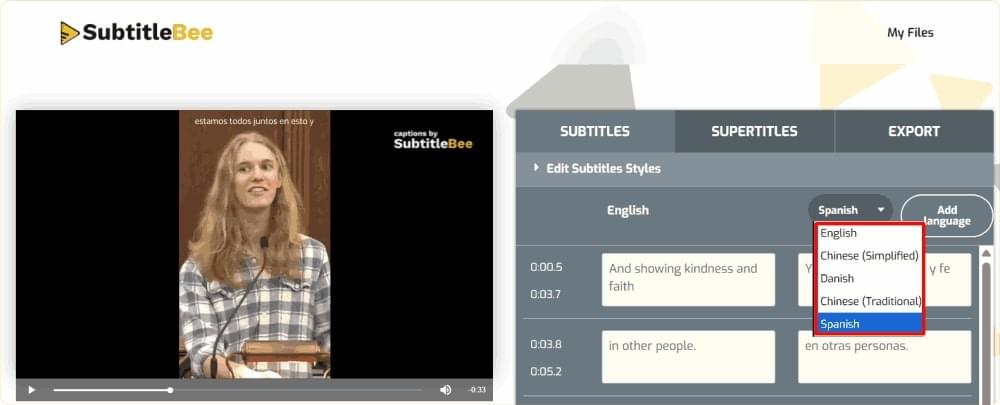
Make sure that the subtitles in the original media language are accurate to ensure reliable translation. Select the language to which you want to translate the subtitles and click Add Subtitles.
Step 3: View the Translated Subtitles
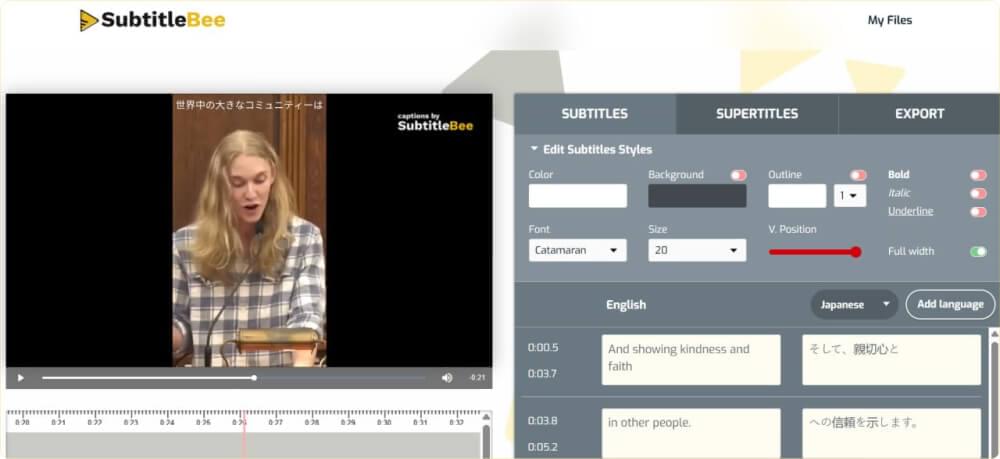
You can view the translated subtitles alongside the original subtitles. This is useful in reviewing and editing to ensure higher accuracy. You can also add translated subtitles in another language by using the Add language option.
Related: How to Translate YouTube Videos: A step-by-step guide
Step 4: Add Another Translation (Optional)
You can also add translated subtitles in another language by using the Add language option.
Part 4: How to Add Overlay Text to Videos (Supertitles) in SubtitleBee?
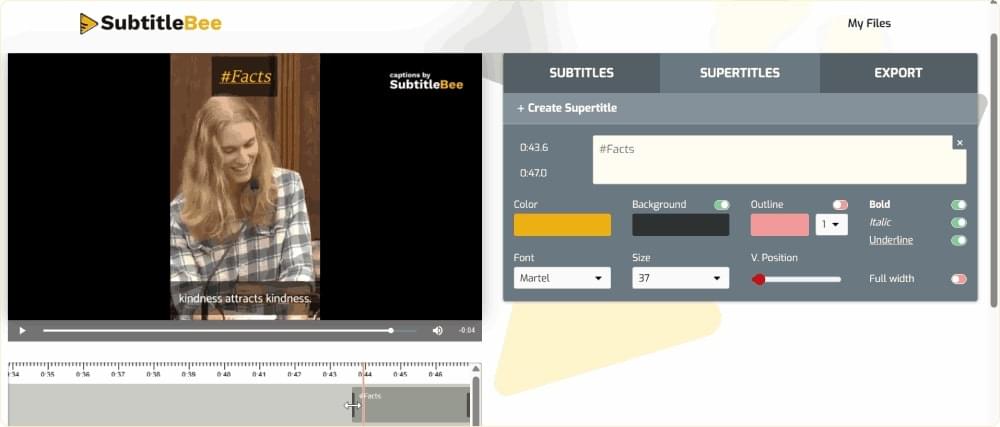
Adding text to videos is a feature that comes in handy for various purposes, including branding and marketing. You can further increase the accessibility and engagement of your videos through such text. Here’s how you can add text to your videos in SubtitleBee using the Supertitles option:
1. Open the Supertitles window.
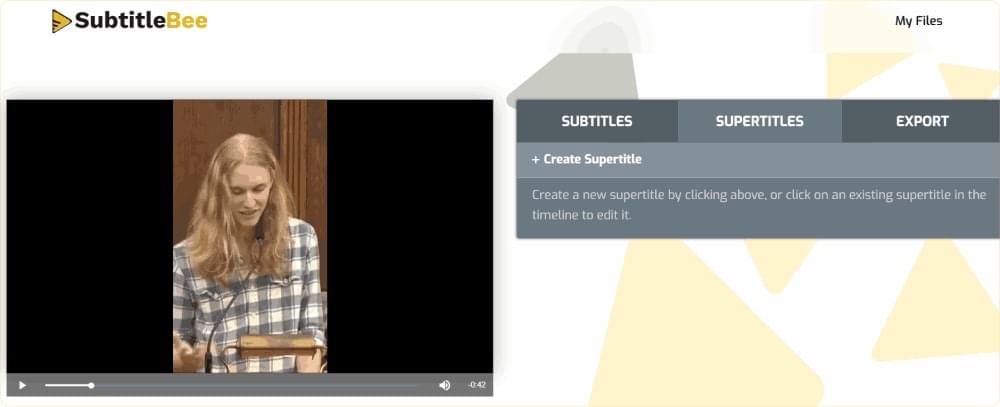
2. Choose to create a new supertitle and adjust its content, color, background, outline, font style, position, and overall style.
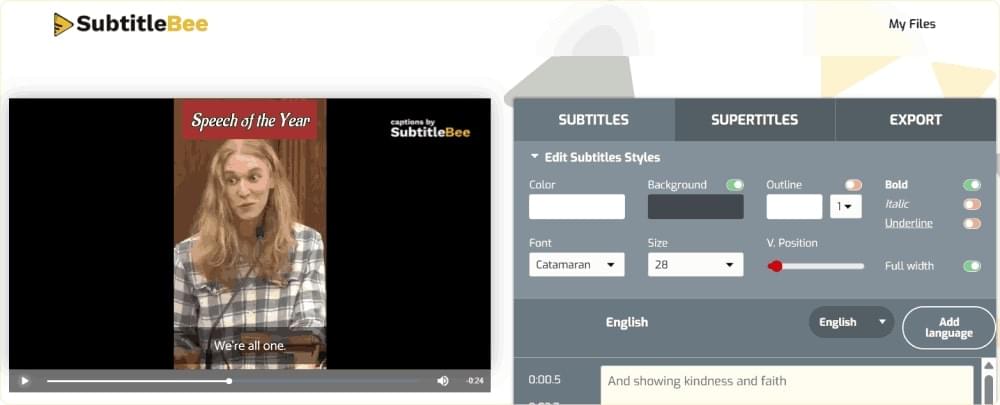
3. You can easily adjust the duration of the supertitle in your video through a simple time slider. Whether you want the text to appear for a few seconds or for the duration of the entire video, you can adjust it via the slider. You can also add multiple supertitles in the same video.

Part 5: How to Export Videos in SubtitleBee?
Once you are done adding subtitles and editing or translating them, it’s time to export your captioned video by following these simple steps:
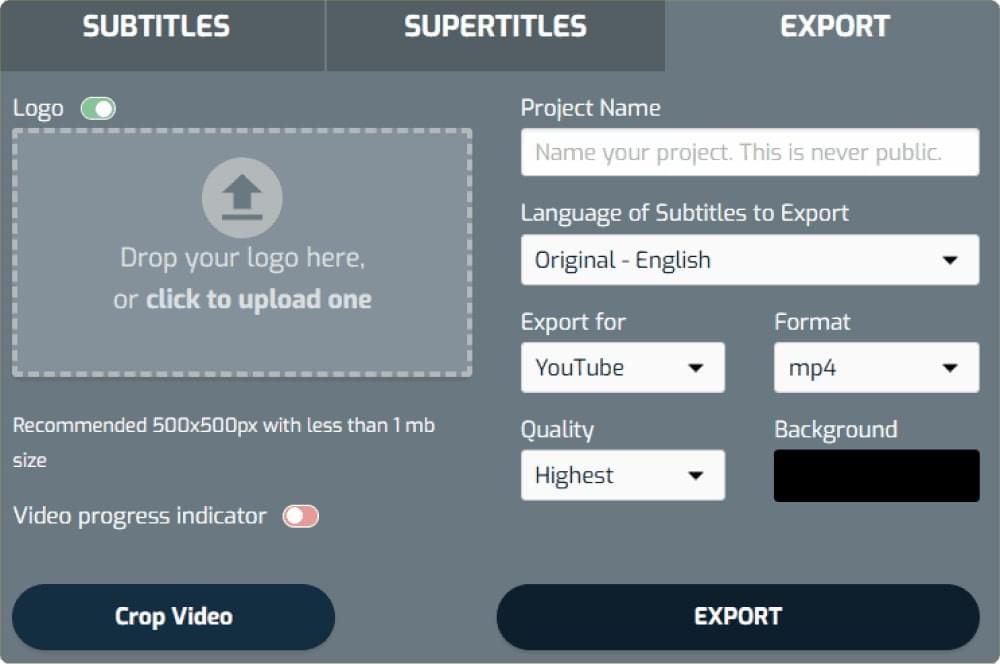
1. Click on the Export option.
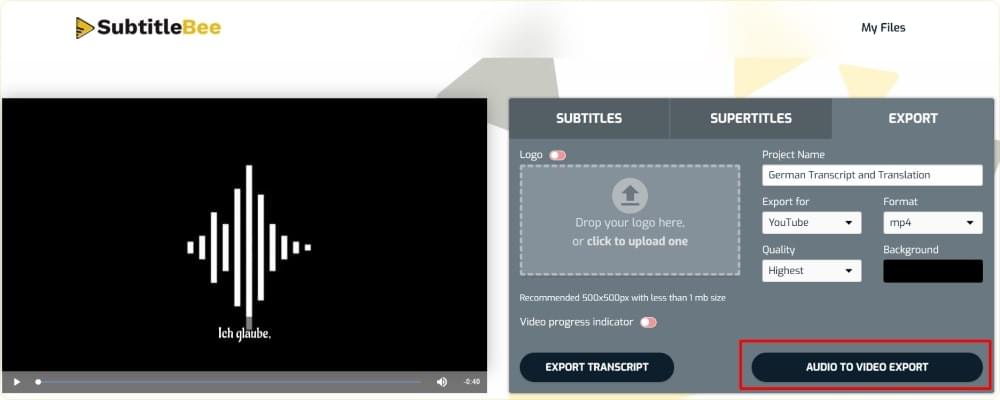
2. There are multiple options available under the Export option to help you make sure you are saving the video with the perfect configurations. These include:
- Logo Toggle (Optional): Upload your brand logo (recommended: 500x500px, <1MB) to watermark your exported video.
- Project Name: Add a project name for easy file organization. This name stays private and is only for your use.
- Toggle Video Progress Indicator: Turn on the video progress bar to visually show viewers how much of the video is left.
- Subtitle Language: Choose the language of subtitles you want to export. If you have added subtitles in multiple languages before, you can pick one here before exporting.
- Choose Export Platform: Select your target platform from multiple options, including YouTube, Facebook, LinkedIn, Instagram Square, Instagram (Portrait, Landscape, Stories, or Carousel), TikTok, and Snapchat.
- Pick Video Format: Export your video in your preferred format, such as MP4, MOV, WMV, AVI, and WebM, to ensure compatibility across devices and platforms.
- Set Export Quality: You can choose from multiple quality levels, from standard to highest, depending on your needs.
- Set Background Color: You can also add and customize the video background color to fill the blank space and match the color with your branding or improve subtitle visibility.
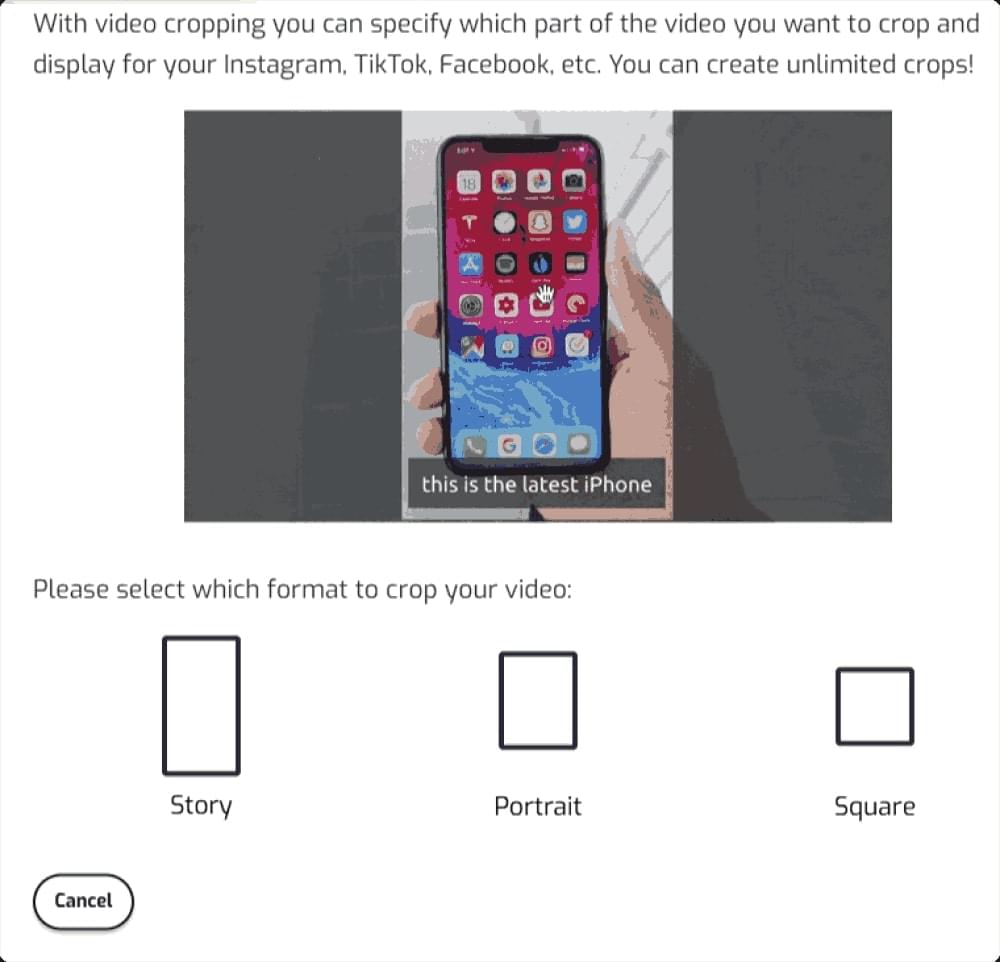
3. You can also choose to crop your videos into square, portrait, or story layouts for different purposes. For example, portrait (9:16) videos are great for short-form content like YouTube Shorts, TikTok, and Instagram Reels. Similarly, square video format is perfect for Facebook and Instagram Feed videos.
Once everything is as per your needs, click on the Export button. You’ll be redirected to the SubtitleBee dashboard, where you’ll get three options:
- Download video: Simply click on this button to save the video to your computer.
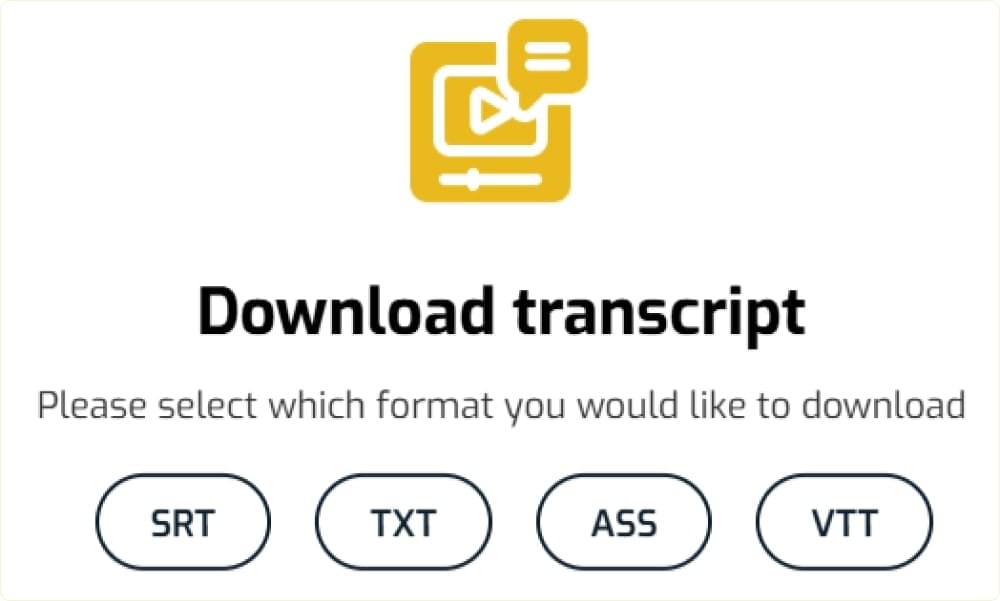
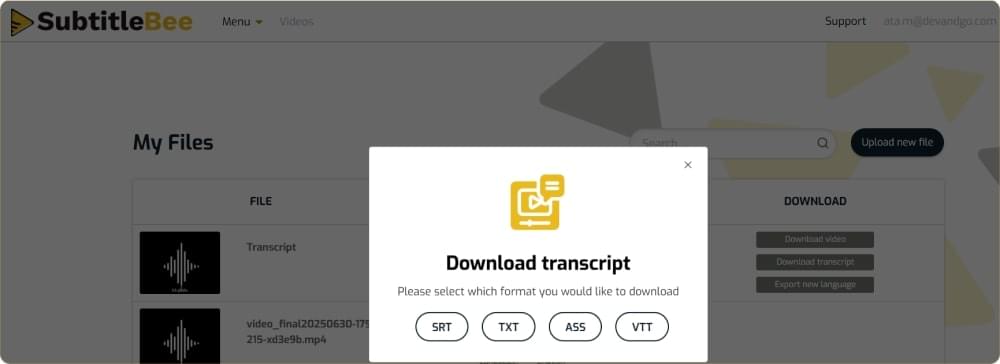
- Download transcript: You can also just download the subtitle or transcript file in SRT, TXT, ASS, or VTT file format.
- Export new language: If you have added multilingual subtitles to your video, you can use this option to export the video in another language.

By following these simple steps, you can easily export and save the subtitled video files or just the subtitles to your computer.
If you are using the free trial, you’ll be able to see the transcript and subtitles within the SubtitleBee’s dashboard for free. But you must upgrade to a paid plan to download the transcript and subtitle files.
Part 6: How to Transcribe Audios using SubtitleBee?
The audio transcription process with SubtitleBee is similar. All you need to do is upload an audio file at the time of uploading the file.
Step 1: Choose the Audio File Language
Select the original language of your audio file.

Step 2: Upload your Audio File
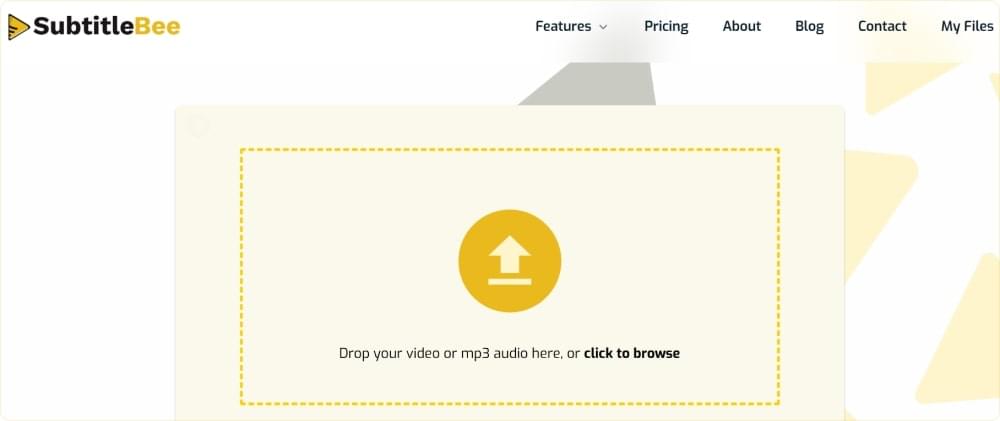
Upload your MP3 audio file by drag-and-drop or simply click on the upload icon and upload the file from your system.
Step 3: View and Edit the Audio Transcript
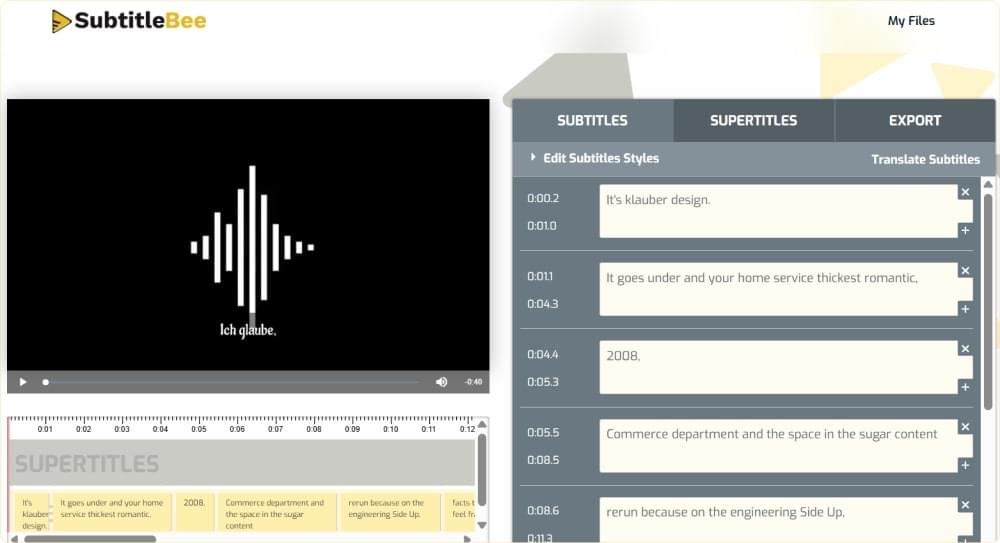
SubtitleBee will use its AI algorithms to analyze your uploaded file and transcribe it. You’ll get to see the transcription and also have the option of editing it before exporting it.
Translate your Audio Transcription (Optional)
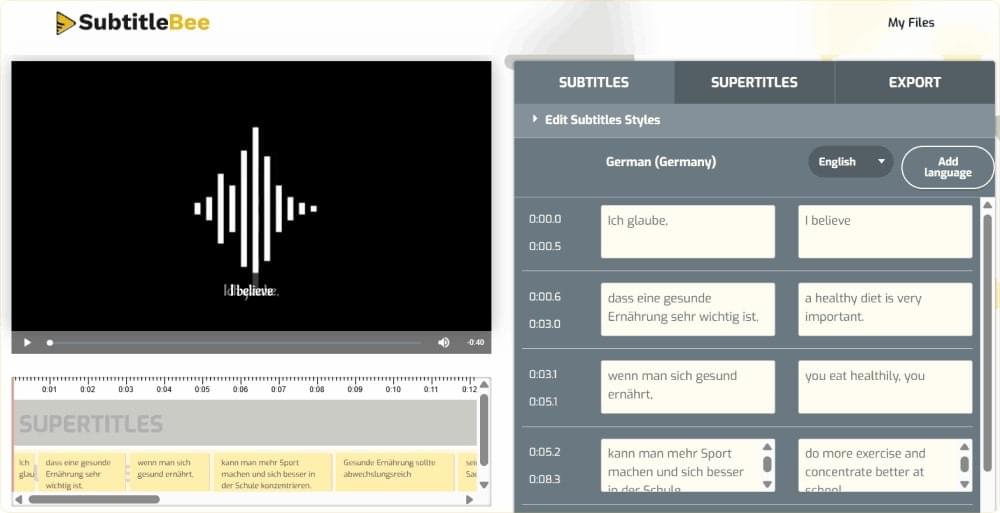
You also have the option of translating the audio transcription. Simply click on the Translate Subtitles option and choose the languages to which you want to translate.
Step 4: Export and Download the Audio Transcript
Go to the Export window. Choose the language in which you want your audio transcript to be. Click on the Export button to save your audio transcript.
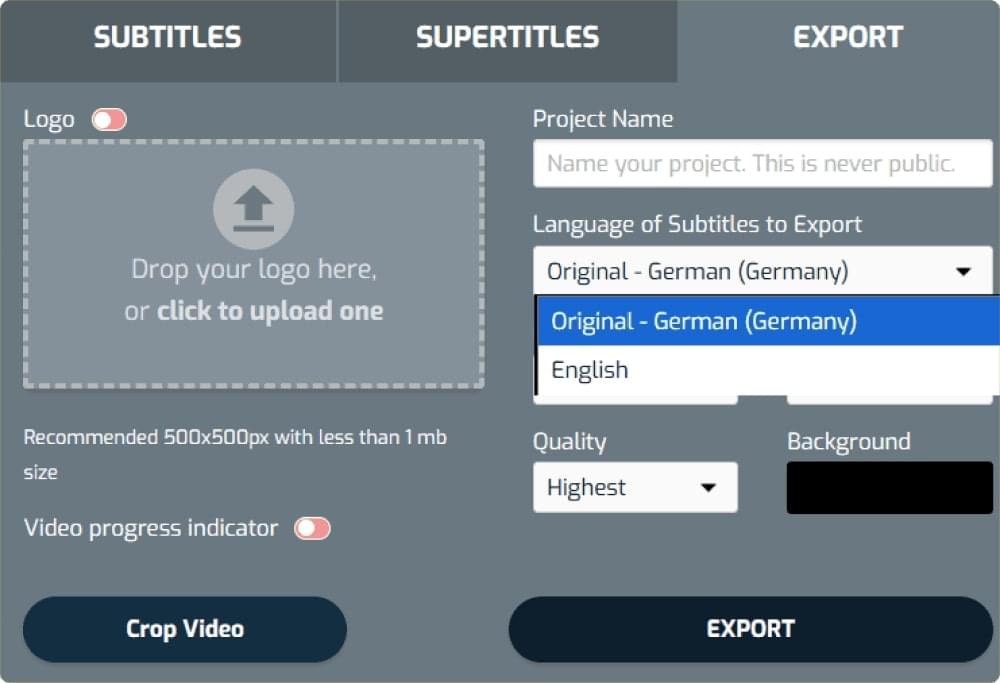
Alternatively, if you want to convert the audio file (MP3) into video, you can do that by using the Audio to Video Export option:
Now you can easily download the audio transcript file in your preferred format, including TXT, SRT, ASS, or VTT.
Related: Best Paid and Free Transcription Services in 2025
Conclusion
By now, you have seen how easy it is to get started with SubtitleBee. Whether you are signing up to add subtitles to your videos or want to translate and transcribe some audio or video content, you can do that by following simple steps.
So, now it’s your turn to sign up, upload your first video, and start captioning your videos to connect with your audience in any language.

FAQs
Let’s discuss some of the frequently asked questions about SubtitleBee
Can I try and generate subtitles for free with SubtitleBee?
Yes. You can try out SubtitleBee for free. It means you’ll be able to generate the subtitles and see the captioned video within SubtitleBee’s interface. However, if you want to download the video, you’ll have to upgrade to a paid plan.
Which video formats does SubtitleBee support?
SubtitleBee supports all major video formats, including MP4, MOV, AVI, WebM, WMV, and others. Hence, you can easily upload your video content in any format to subtitle, translate, transcribe, and edit it.
How can I upload videos to add subtitles?
You can add videos to SubtitleBee either by uploading them from your computer or pasting a video link from sites like Vimeo or YouTube.
Can I translate subtitles into different languages?
Yes! SubtitleBee supports adding and translating subtitles in 120+ languages. You can even translate the subtitles into different languages at the same time and then export the video one by one with the required captions.
Can I embed subtitles (open captions) into my videos?
Yes. Once you upload your video to SubtitleBee, it automatically generates and synchronizes the subtitles. You can then export the video with subtitles permanently burned in. Alternatively, you can also download the subtitle or transcript file separately in SRT, ASS, VTT, or TXT format.
Does SubtitleBee offer transcription from audio files?
Yes. You can transcribe your audio file by uploading it to SubtitleBee and downloading its transcript either in the original media language or even translating it to another language.
Are my video and audio content safe in SubtitleBee?
Absolutely! SubtitleBee has strong privacy and security protocols to ensure your content is never shared with anyone. You can also delete your files from your account anytime.
Add and translate your subtitles to more than 100 languages with high accuracy


