
video tutorials for social media
How to Create a VTT File for Subtitles | Top 2 Methods
Undoubtedly, video content dominates the internet. Statistics show that video makes up 82.5% of the entire internet traffic. However, without proper subtitles, you can risk excluding millions of viewers who either speak a different language or have difficulty in hearing.
This is where subtitle files, like VTT, become important to make your video content more accessible and engaging.
There is a high chance that you are already with SRT files because they are the most popular subtitle format. However, knowing how to create a VTT file for subtitles can also be beneficial it provides additional features to expand your video’s reach and impact.

In this guide, we’ll explore two methods to create VTT (also called WebVTT) files: a manual approach using simple text editors and an automated solution using SubtitleBee.
Overview of VTT Files
Before diving into the detailed methods of how to create VTT files, let’s go through some basics:
What is a VTT File?
VTT stands for “Video Text Tracks”. It is also called the WebVTT file. It uses the Web Video Text Tracks format.
VTT file fomrat is is developed specifically for HTML5 video. Hence, VTT files are the modern standard for web-based subtitles and captions. Major platforms like YouTube and Vimeo have subtitles in VTT files. Remember that VTT files are different from older subtitle file formats because they have better functionality, greater web compatibility, and advanced styling options.
Benefits of Using VTT Files for Subtitles
The following are the key benefits of creating and using VTT files for subtitles:
- High Compatibility: VTT files are compatible with all browsers. So, you don’t need to install any third-party software to use VTT subtitle files.
- Supports HTML5: WebVTT is the official subtitle format for HTML5 videos. Hence, it provides accurate synchronization across different devices.
- Contains Additional Metadata Information: You can include additional information like speaker name, descriptions of sound effects, and chapter numbers in a VTT file. This type of extra information is not possible to add in other subtitle files.
- Optimized for Mobile: VTT files automatically adapt to different screen sizes. Hence, VTT subtitles remain visible on devices of different sizes, including mobile phones, tablets, and desktops.
- Includes advanced Styling Options: VTT supports CSS-style formatting, which is not possible in basic SRT files. It helps you in customizing font colors, sizes, positions, and backgrounds in VTT files for higher readability.
The above discussion is a brief overview of the VTT files. If you want to know more about VTT files and how to open them, you can read our detailed guide about what is a VTT file and how it works.
Now, let’s move to the main point of this guide: how to create VTT files.
Method 1: How to Create VTT Files Manually (Notepad Method)
You should know how to create a VTT file manually using a simple Notepad file if you want complete control over the subtitle file.
But you must keep in mind that this method takes a lot of time and effort. Generally, the manual method is suitable for short videos that has a duration of few seconds. If you want to create VTT file for longer videos, you should use an AI subtitle generator that we will be discussing later in the method 2.
Overview of VTT File Structure
The following image shows the general structure of a WebVTT file:

Every VTT file has these components:
1. Header: “WEBVTT” is placed on the very first line of every VTT file.
2. Timestamps: A VTT file has the timestamps in this format: HH:MM:SS.mmm --> HH:MM:SS.mmm
3. Subtitle Text: This is the content that is visible to the viewers from the VTT file.
4. Styling (Optional): You can customize the VTT file to include different positions, alignment, and formatting commands for better styling.
Step-by-Step Guide to Create a VTT File Manually
Follow these steps to create a VTT file manually:
Step 1: Prerequisites
Before starting the VTT file creation process, make sure you have the following things:
- A plain text editor. It can be the Notepad on Windows, TextEdit on Mac, or any advanced editor like Notepad++
- The video file that you want to subtitle
- A quiet environment for accurate transcription OR already written subtitles that you want to format in a VTT file.
Step 2: Create the File Header
Open your text editor, such as Notepad, and write:
1 | WEBVTT |
The “INFO” line is optional. Such lines are usually added for file identification, but you can omit it and just keep the WEBTT header line.
Step 3: Add Timestamps and Subtitle Text
Create subtitle blocks by following this format:
1 | WEBVTT |
You can maximize the quality of your VTT file by following these best practices:
- Keep the display time of a single subtitle between 1.5 to 6 seconds.
- Add a gap of about 0.5-1 seconds for higher readability and processing
- Aim for a reading speed of 150-180 words per minute maximum.
Step 4: Formatting and Styling Options (Advanced)
VTT supports advanced subtitle formatting and styling options, such as these:
1 | WEBVTT |
Step 5: Save as VTT File
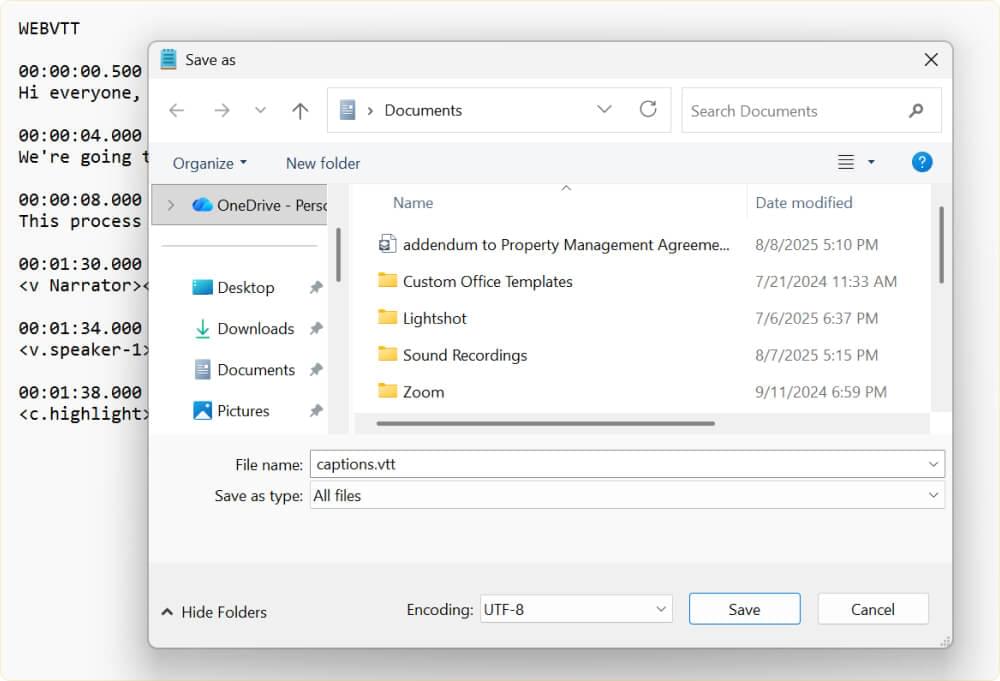
Once everything is done, go to File and click on Save As.

Change the Save as type to All files and add .vtt file extension at the end of your file name. The subtitle file will now be saved as a VTT file.
This entire process of creating VTT files is simple, but can be very time-consuming. So, it is recommended that you benefit from the online subtitle generators to create subtitles and VTT files automatically and quickly.
Method 2: Using SubtitleBee to Create VTT Files (Recommended)
SubtitleBee is a smart choice for video content creators and businesses that want maximum precision and speed in adding subtitles to their videos. It is an AI-powered platform that makes the VTT subtitle file creation process quicker and efficient.
Here’s how.
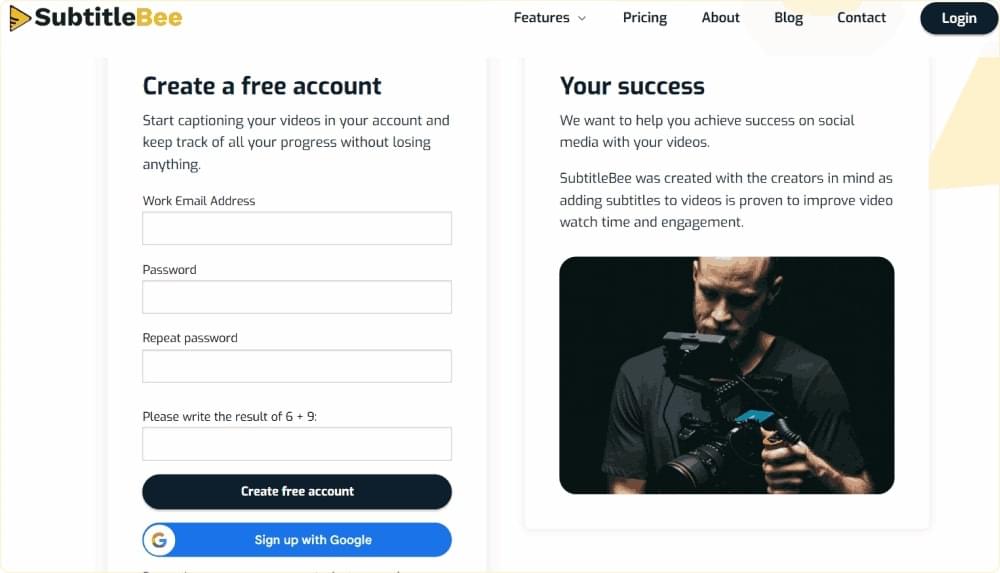
Step 1: Create Your Account on SubtitleBee
First of all, open SubtitleBee’s website and go to the sign-up page. Create your account and choose a subscription plan based on your needs. Login to your account to access the dashboard.
Step 2: Choose to Upload a File
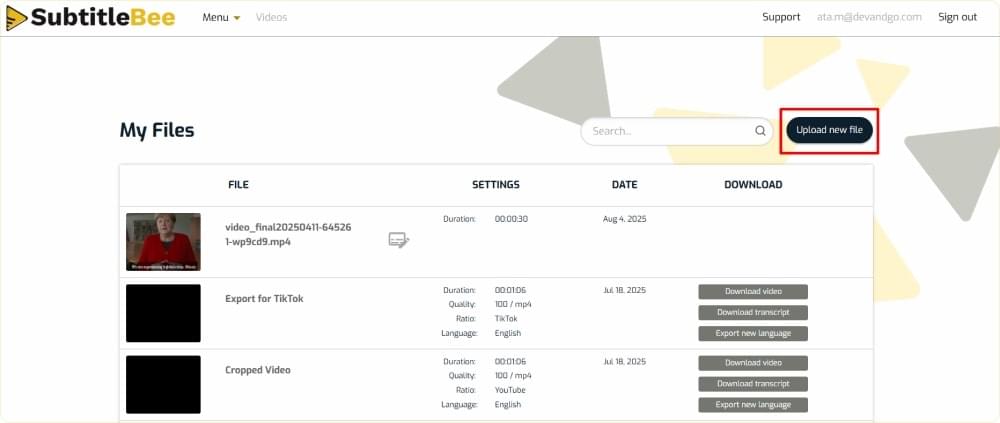
You can easily upload your video (or audio) into SubtitleBee as it supports all major media formats.
All you need to do is click on the Upload new file button on your dashboard.
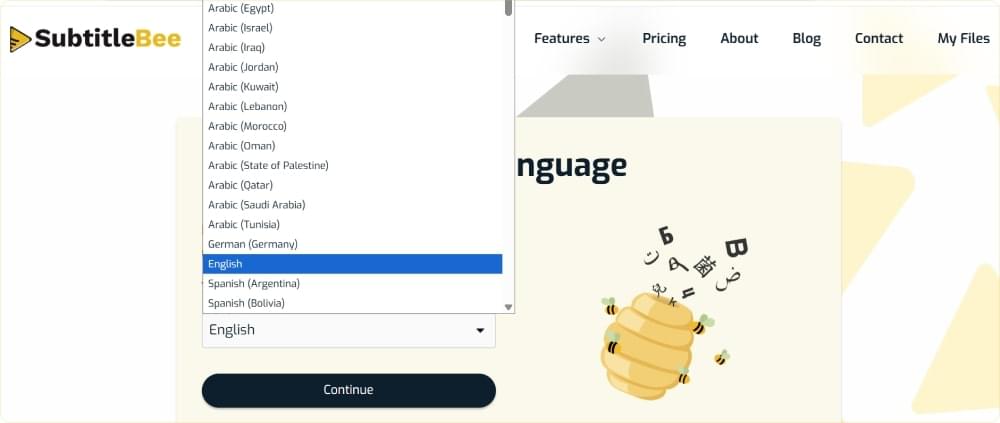
Step 3: Choose Media Language
Choose the media language of your content. Double check the language to ensure accurate selection so that SubtitleBee’s AI algorithm can properly analyze the content to generate accurate subtitles for the VTT file.
Step 4: Upload Your Video
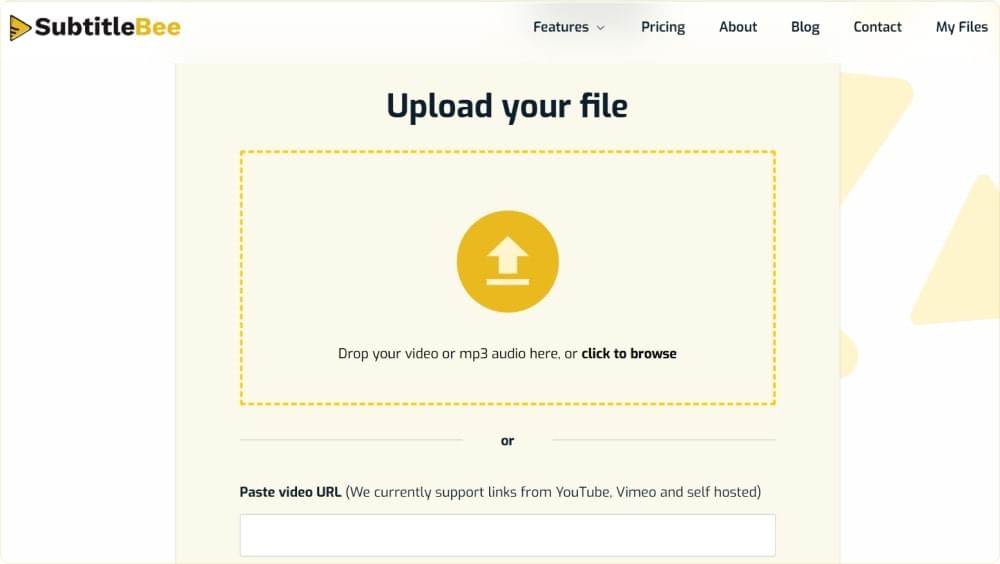
Now, upload the file using the drag-and-drop interface or use the browse option. SubtitleBee supports a file of up to 5 GB. However, it is recommended that you upload a video of up to 60 minutes with a file size of 1 GB for best results.
Step 5: Check the Subtitles
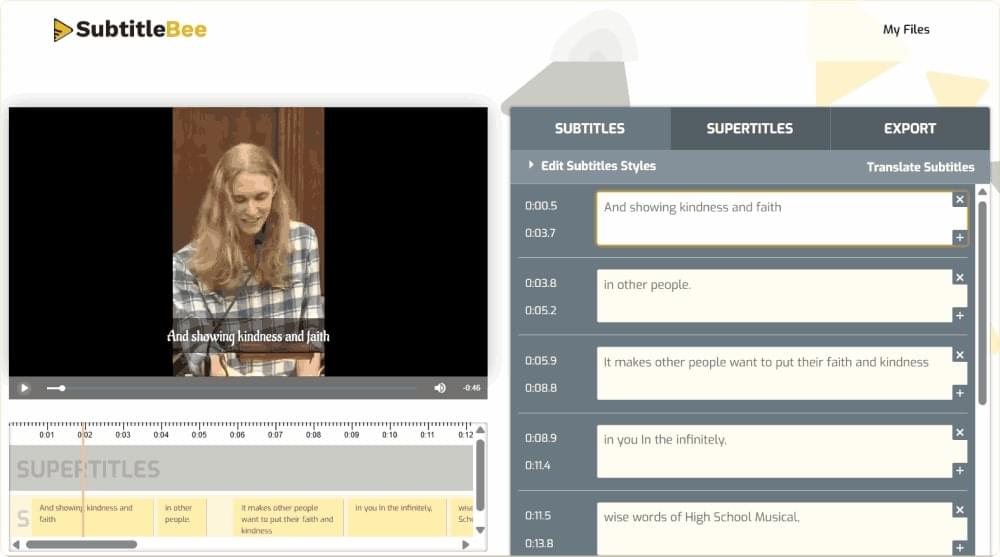
SubtitleBee’s AI engine will analyze your content to generate accurate subtitles. You can check the generated subtitles and also make any edits, if required.
Step 6: Edit Subtitle Style (Optional)
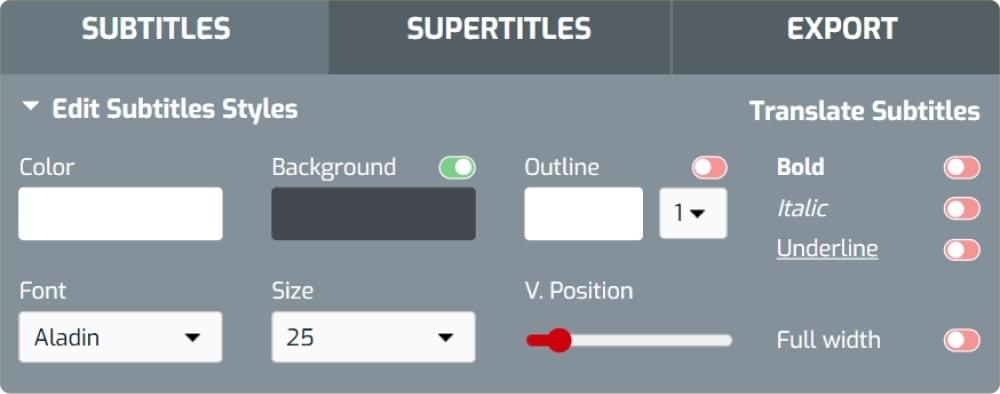
If you add additional subtitle styling, click on the Edit Subtitles Styles button.
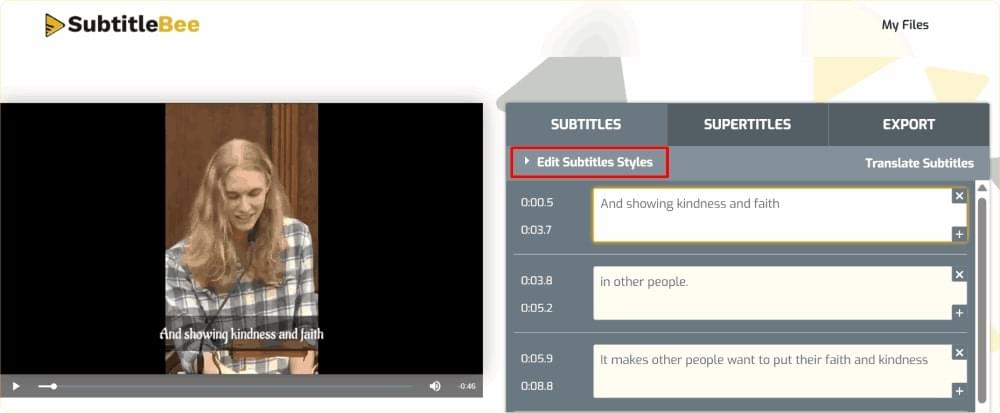
There are multiple editing and styling options through which you can modify subtitle color, font, size, background, add outline, edit position, and overall appearance of the captions. Once your subtitles are finalized, click on the Export option to save your progress. You can further configure your videos by using the logo toggle, adding project name, or resizing the video for a suitable format.
Step 7: Export and Download VTT File
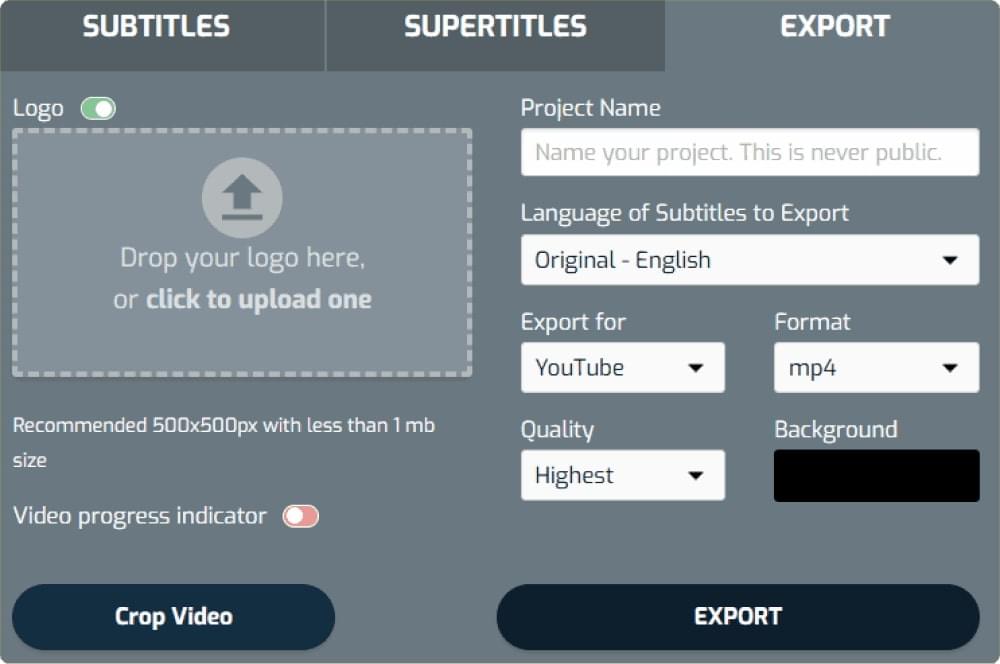
Once your subtitles are finalized, click on the Export option to save your progress. You can further configure your videos by using the logo toggle, adding a project name, or resizing the video for a suitable format. Click on the export button.
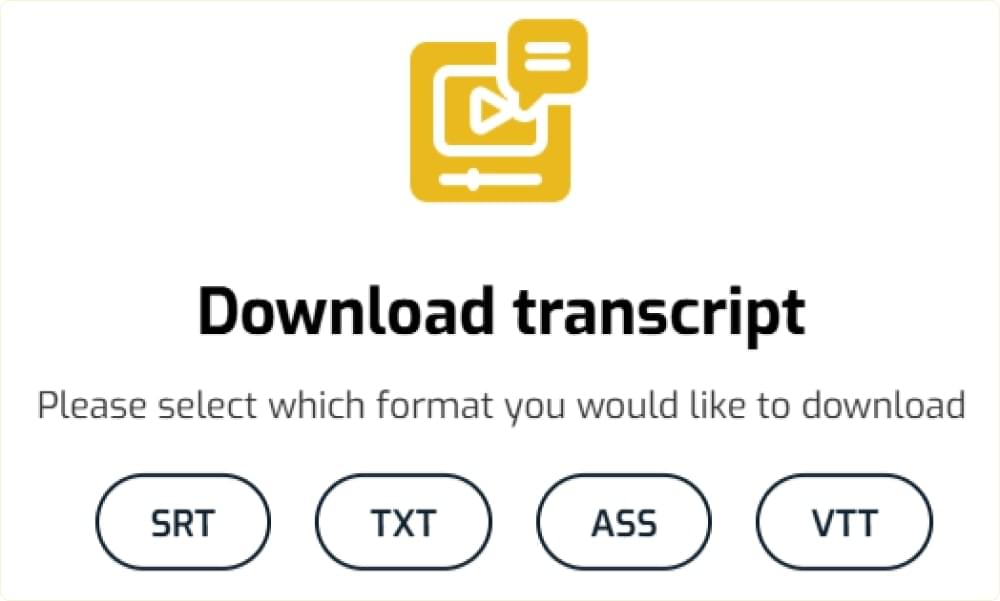
Now, from the dashboard, use the Download Transcript option to save the subtitle file in SRT, TXT, ASS, or VTT. You can also download the subtitled video.
Hence, by following these simple steps, you can add subtitles to your videos and download the WebVTT subtitle file.
Note: In the free trial of SubtitleBee, you can only try out the interface and add or edit subtitles for a video of up to 10 minutes. You won’t be able to download the video or VTT file in free version. So, you have to upgrade to a paid plan to get full access and download VTT files.

Conclusion
The bottom line is that creating VTT files for subtitles is easier than ever before with SubtitleBee. We’ve also discussed the step-by-step manual process, so you can even try out creating a WebVTT file with a simple Notepad file, but it can take a lot of time and result in human errors.
If you want to enjoy over 95% accuracy in subtitle generation and complete the process quickly, try out SubtitleBee today and start subtitling your videos.
Related: How to Create SRT File for Video Subtitles Easily
FAQs
What is a VTT file?
VTT file format stands for WebVTT subtitle format. It is a popular online subtitle format in which subtitles are stored along with their timing and styling data. Most of the streaming platforms, such as YouTube, store subtitles in VTT format.
Why should I add subtitles to my video in WebVTT format?
You should create and add subtitles to your video in WebVTT format to increase your reach, ensure higher accessibility, and improve engagement. Moreover, a lot of people nowadays prefer watching videos on mute, so you can reach them with subtitled videos.
What is the best way to create a VTT file?
The best way to create a VTT file is to use a subtitle generator like SubtitleBee. It will save your time as all you need to do is upload the video, let the tool transcribe, and then, you can download the subtitled video or a standalone transcript in VTT subtitle file format.
Add and translate your subtitles to more than 100 languages with high accuracy


