



video tutorials for social media
How to Add Captions to a Video (Automatically, Free, on Any Device)
Most people watch videos with the sound off, on a phone, while doing something else. If your video has no captions, they scroll past it. Adding captions to a video used to mean typing every line by hand and dragging it onto a timeline. Today an AI caption generator does the typing and timing in a few minutes, and you spend your time on a quick proofread and the styling.
This guide shows you how to add captions to a video the fast way, then covers the alternatives: adding captions in your editor, on your phone, on YouTube, and as a separate caption file. You will also learn the difference between open and closed captions so you export the right thing for each platform.
Captions vs Subtitles: A Quick Note Before You Start
People use “captions” and “subtitles” interchangeably, and for this guide that is fine. Strictly speaking, captions are written for viewers who cannot hear the audio, so they include sound cues like [music] or [door slams]. Subtitles assume you can hear and only translate or transcribe the dialogue. The tools and steps below work for both. If you want the full breakdown, read our guide on closed captioning vs subtitles.
There is a second distinction that matters more in practice:
- Open captions are burned into the video frames. They are always visible and work anywhere the video plays, including Instagram, TikTok and any player with no caption support.
- Closed captions live in a separate file or track (usually .srt or .vtt). Viewers can switch them on and off. YouTube, Vimeo, LinkedIn and most video hosts support them.
Decide which one you need before you export. Many creators do both: a burned-in version for social feeds and an SRT file for YouTube and accessibility compliance.
Three Ways to Add Captions to a Video
There are only three real methods. Everything else is a variation of one of these.
- Auto-generate captions with an AI tool. Upload the video, the tool transcribes the speech and times each line, you proofread and export. This is the fastest option and the one we walk through in detail below.
- Type captions manually in a video editor. Premiere Pro, DaVinci Resolve, iMovie, CapCut and Canva all let you add text layers. It gives you total control and takes a long time. A ten minute video can take an hour or more to caption by hand.
- Upload a caption file. If you already have an .srt or .vtt file (from a transcription service or an earlier edit), YouTube, Vimeo, Facebook and LinkedIn let you attach it to the video as closed captions.
Method one is where you should start. It produces the caption file for method three as a by-product, and the auto-generated text is a better starting point than a blank timeline if you still want to finish the job in an editor.
How to Add Captions to a Video Automatically
Here is the full process in SubtitleBee. It takes about five minutes for a short video, most of which is the AI working while you wait.
Step 1: Upload Your Video
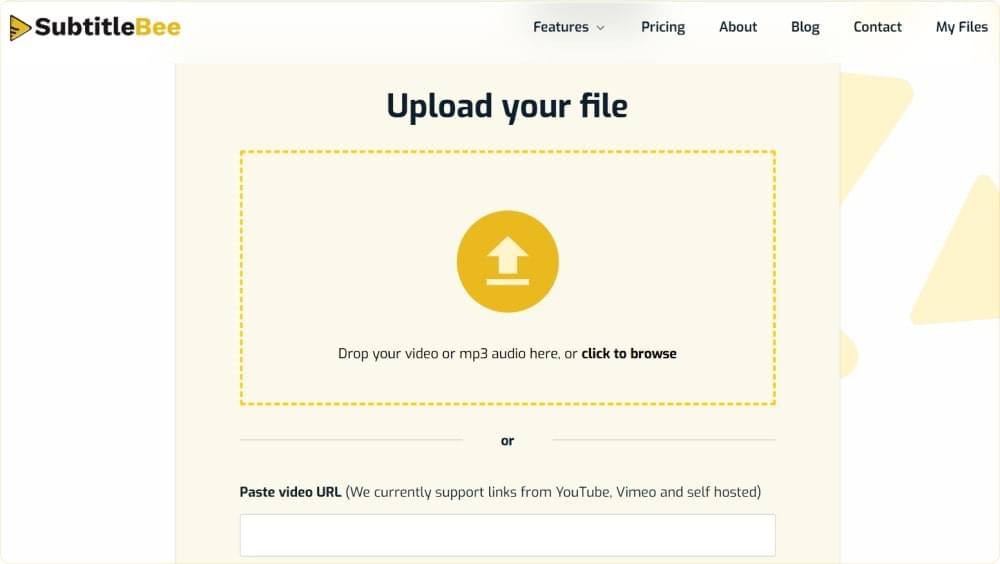
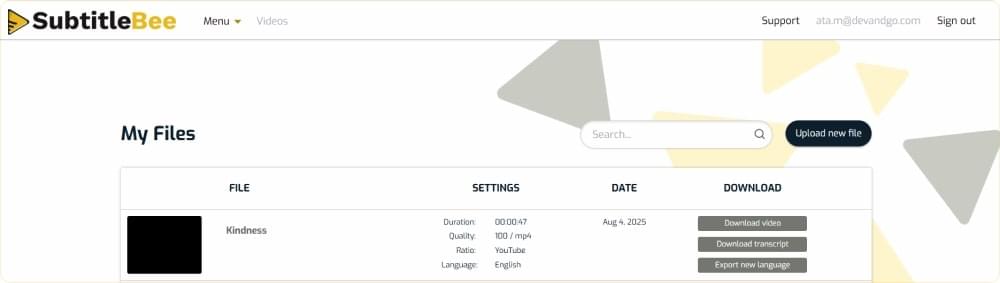
Sign in to your SubtitleBee dashboard and click Upload New File. You can upload MP4, MOV, WMV, AVI and WebM files in any aspect ratio and resolution. If you are on the free plan, keep the video under ten minutes.
Step 2: Choose the Spoken Language
Pick the language spoken in the video. This tells the speech recognition model what to listen for and has a big effect on accuracy, so do not leave it on the wrong default if your video is not in English.
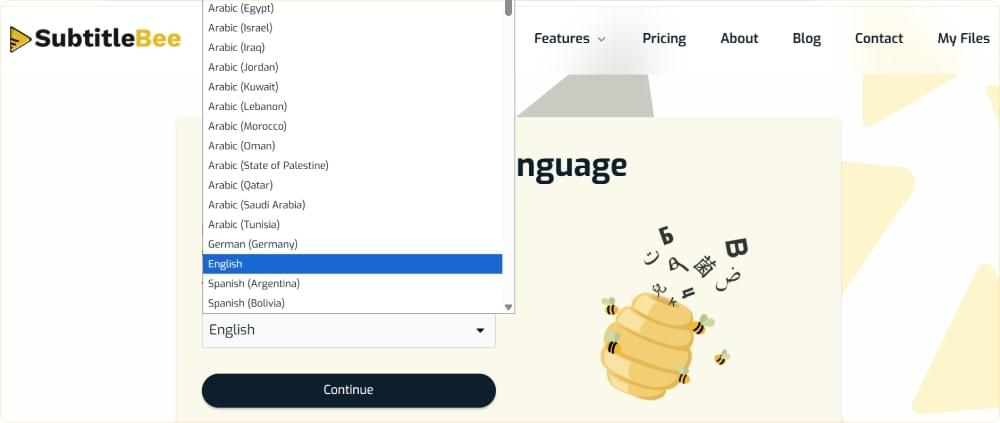
Click Submit and the AI transcribes the audio and splits it into timed caption lines. On a typical five minute video this takes about a minute or two.
Step 3: Proofread and Edit the Captions
Auto-generated captions are around 95 percent accurate on clear audio. That last five percent is usually names, brand names, technical terms and words drowned out by background music. Play the video in the editor and fix anything wrong. Click any caption line to edit the text, and drag the timing handles if a line appears too early or too late.
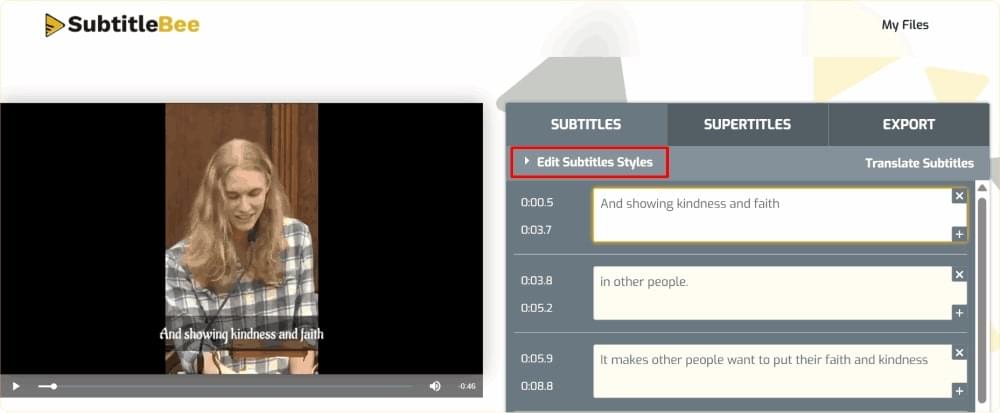
Two edits that make a big difference to readability:
- Split long lines. A caption should be readable in the time it is on screen, so keep each line to one or two short sentences.
- Remove filler words like “um” and “you know” unless the video is an interview where they matter.
Step 4: Style the Captions
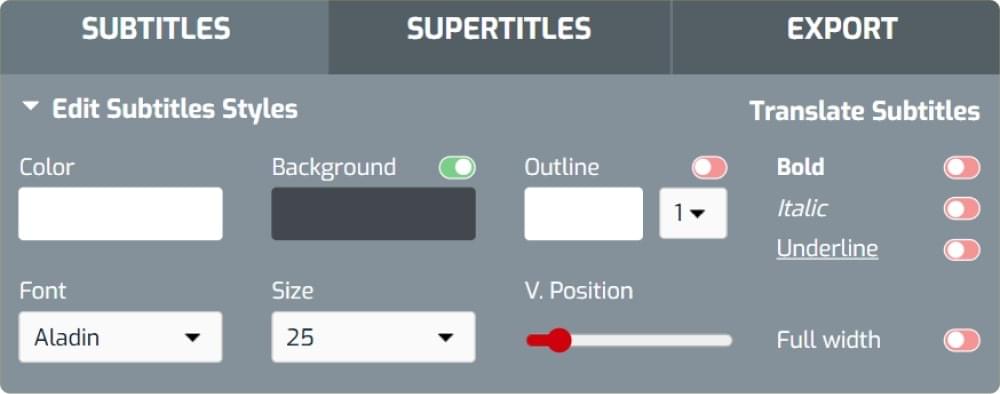
Open the style options to change the font, size, colour, background and position of the captions. For social video, a bold sans-serif font, white or yellow text and a dark semi-transparent background is the combination that stays readable over any footage. Keep the captions in the lower third but above any platform UI (TikTok and Reels cover the bottom of the frame with buttons and descriptions). Our guide to the best subtitle fonts for your videos goes deeper on font choice.
Step 5: Export the Video or Download the Caption File
Click Export. You have two choices, and you can take both:
- Export the video with the captions burned in as open captions. Choose the resolution and aspect ratio you need for the platform you are posting to.
- Download the caption file in .srt, .vtt, .ass or .txt format to upload as closed captions on YouTube, Vimeo or LinkedIn, or to import into your video editor.
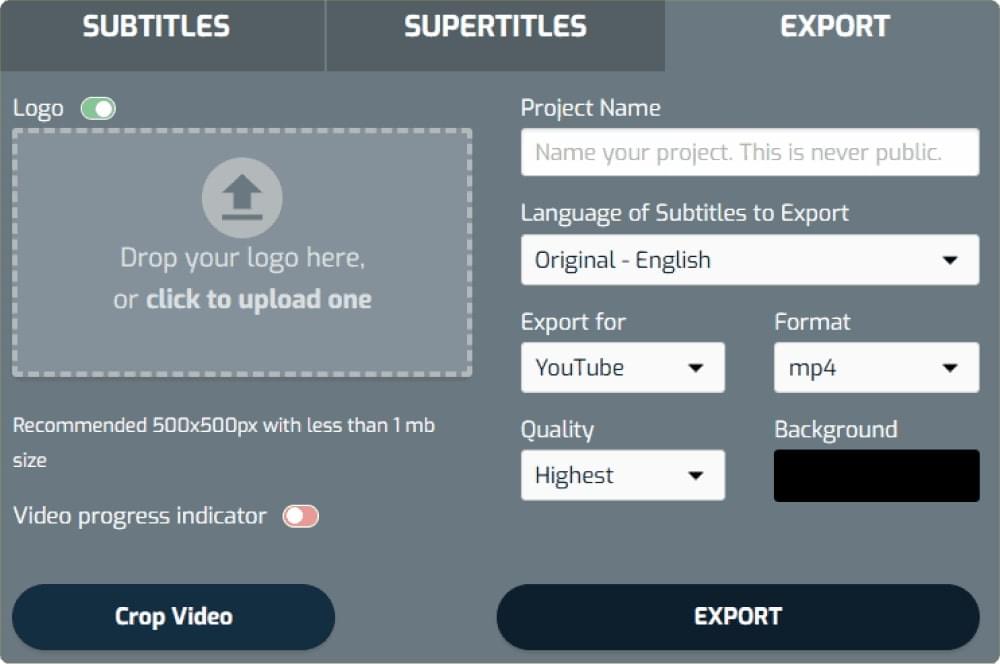
Once the export finishes, download the file or share it straight to your social channels from the dashboard.
Optional: Translate the Captions
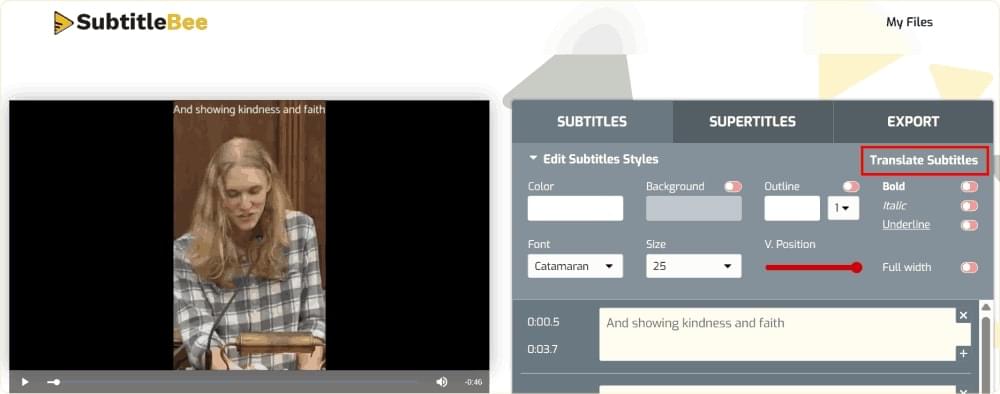
If your audience is not all in one language, click Translate after the original captions are correct and choose the target languages. The translation uses your corrected text, so proofread first. Each translation becomes its own caption track that you can burn in or download as a separate SRT. This is the quickest way to publish one video with English, Spanish and Portuguese captions, for example. Learn more about translating subtitles into multiple languages.
How to Add Captions to a Video on iPhone or Android
You do not need a desktop for any of the steps above. SubtitleBee runs in the browser, so open it on your phone, upload from your camera roll, and export the captioned video back to your phone. That is the simplest route if you record on your phone and post from it.
If you want a native app instead, the built-in options are limited:
- iPhone: The Photos app does not add captions. iMovie for iOS lets you add text titles clip by clip, which is manual work. Clips (Apple’s free app) has Live Titles that caption as you record, but only while recording, not for existing videos. See our step-by-step guide on adding captions and subtitles in iMovie.
- Android: Google Photos has no caption tool. Most Android users caption inside CapCut or the app they are posting to.
For short social clips, the platforms themselves can caption for you, which brings us to the next section.
How to Add Captions on TikTok, Instagram and YouTube
Each platform has a built-in auto-caption feature. They are convenient, and they all share the same limits: captions only exist inside that platform, the styling options are basic, and you cannot download the caption file to reuse elsewhere.
- TikTok: Tap the Captions sticker in the editing screen and TikTok transcribes the audio. Editing the text is possible but fiddly. Full steps in how to add captions to TikTok.
- Instagram Reels: Tap the sticker icon and choose Captions. Same idea, same limits. See how to add captions to Reels.
- YouTube: YouTube auto-generates closed captions after upload, in YouTube Studio under Subtitles. Accuracy is decent for clear English audio. You can also upload your own .srt file there, which is the route we recommend if you already captioned the video. For Shorts, read how to add captions to YouTube Shorts.
If you post the same video to more than one platform, caption it once with a tool, export the burned-in version, and upload the SRT to YouTube. You get consistent captions everywhere and only proofread once.
How to Add Captions in Video Editors
If you are already editing in a desktop app, you have two options: type captions by hand or import an SRT generated by a tool. Importing is almost always faster.
Premiere Pro
Premiere Pro has its own speech-to-text captioning. Open the Text panel, click Transcribe, then Create Captions from the transcript. It works well for English and the styling controls are excellent. The transcription runs on your machine, so it is slower on older computers, and the captions are tied to the Premiere project. Alternatively, go to File, Import and choose an .srt file, then drag the caption track onto the timeline.
CapCut
CapCut Desktop and the mobile app both have Auto Captions under Text. It is free and fast, and the templates are built for TikTok-style animated captions. The downside is that the free tier watermarks exports in some regions, and you cannot export the captions as a file.
Canva
Canva’s video editor can generate captions from the Text tab (Captions) on paid plans, or you can upload an SRT. Canva is fine for simple captioned videos and slideshows but it is not built for editing timing precisely.
DaVinci Resolve and iMovie
DaVinci Resolve Studio has built-in transcription. The free version does not, so the standard workflow is to generate an SRT elsewhere and import it through File, Import, Subtitle. iMovie has no caption import at all: you add text titles clip by clip, which is why most iMovie users caption their exported video in a browser tool instead. We cover both in how to add subtitles in DaVinci Resolve and the iMovie guide linked above.
Burned-In Captions or a Separate Caption File?
Once you have the captions, you have to decide how to deliver them. Here is the short version.
| Burned-in (open) captions | Caption file (closed captions) | |
|---|---|---|
| Where they work | Everywhere, any player | Only on players that support caption tracks |
| Viewer can turn off | No | Yes |
| Styling control | Full (font, colour, animation) | Limited to the player’s style |
| Accessibility compliance | Partial (screen readers cannot read them) | Yes, this is what WCAG and ADA guidance expects |
| Best for | Social feeds, ads, silent autoplay | YouTube, Vimeo, LMS platforms, corporate video |
If you only export one thing, export the burned-in video for social and keep the SRT file in case you need it later. For a deeper look at the burned-in option, read how to hardcode subtitles.
Can You Add Captions to a Video for Free?
Yes, with a few trade-offs depending on the route:
- Platform auto-captions (TikTok, Instagram, YouTube) are free but locked to that platform.
- Free tiers of caption tools usually cap the video length and add a watermark to the exported video. SubtitleBee’s free plan captions videos up to ten minutes with a watermark on the export. Downloading the caption file and uploading it to YouTube as closed captions is a watermark-free way to use the free plan.
- Free editors like CapCut and DaVinci Resolve (non-Studio) cost nothing but expect manual work or an imported SRT.
If you caption videos every week, the Starter plan removes the watermark and adds translation and more minutes. For a comparison of the free options, see how to add subtitles to video online without a watermark.
Caption Mistakes That Cost You Viewers
You will see these in the wild every day. Avoid them and your captions will look professional.
- Captions covering the action. Keep them in the lower third and check the platform’s safe zones.
- Lines that are too long. If a viewer cannot read the line before it disappears, the caption is useless. Two short lines beat one long one.
- Unchecked auto-captions. “Our new pricing” becomes “our new prison” more often than you would think. Always proofread names, numbers and product terms.
- Low contrast. White text with no background over bright footage disappears. Add a background box or a text outline.
- Skipping the SRT. Burned-in captions do not help screen readers or search. If accessibility or SEO matters, upload the closed caption file too.
Frequently Asked Questions
How Do I Add Captions to My iPhone Video?
Upload the video from your camera roll to a browser-based caption generator like SubtitleBee, let it auto-generate the captions, proofread, and export the captioned video back to your phone. iMovie for iOS can add text titles manually, and the Clips app can caption while you record, but neither auto-captions an existing video.
How Can I Automatically Add Captions to a Video Online for Free?
Use a caption generator with a free plan. Upload the video, choose the language, let the AI transcribe it, then export. On SubtitleBee the free plan covers videos up to ten minutes and adds a watermark to the exported video. The caption file download is not watermarked.
Where Can I Get Captions or Subtitles for a Video for Free?
If it is your own video, generate them with an AI caption tool (see above). If it is someone else’s video, YouTube auto-captions most uploads and you can turn them on with the CC button, but you cannot legally download and reuse captions from content you do not own.
How Do I Add Captions to an MP4 File?
Upload the MP4 to a caption generator, generate and edit the captions, then export a new MP4 with the captions burned in. If you need closed captions instead, download the .srt file and keep it alongside the MP4. Most players, including VLC, load an .srt automatically if it has the same filename as the video.
How Do I Add Closed Captions to a Video?
Closed captions are a separate caption file (.srt or .vtt) attached to the video on the hosting platform. Generate the captions, download the file, then upload it in YouTube Studio (Subtitles), Vimeo (Distribution, Subtitles), LinkedIn (video upload options) or your LMS. Viewers toggle them with the CC button.
How Accurate Are Auto-Generated Captions?
On clear speech with little background noise, about 95 percent. Accuracy drops with heavy accents, crosstalk, music under the voice and specialised vocabulary. Plan on a quick proofread every time, and record with a decent microphone if you can.
Start Adding Captions to Your Videos
Captions are no longer optional if you want people to watch past the first two seconds, and they no longer take an hour per video to make. Upload your video, let the AI generate the captions, fix the handful of words it missed, style them, and export. The whole process takes minutes, and you get an SRT file for YouTube and accessibility at the same time.
Try SubtitleBee for free and add captions to your next video today.


Add and translate your subtitles to more than 100 languages with high accuracy
Our solution
SubtitleBee
Make your video understandable by using SubtitleBee for free
Start now for freeTop Articles

Getting Started with AI-Powered SubtitleBee

3 Effective Ways To Add Subtitles To Video Online Without Watermark
VEED vs. Kapwing: Which Subtitle Generator wins?
Kapwing vs. SubtitleBee: Which subtitling tool should you choose?

5 Top Verbit Alternatives for Transcription