
video tutorials for social media
How to Add Spanish Subtitles to a Video
Given the massive impact of subtitles and captions on video engagement, there is no doubt that it is essential to add subtitles in order to maximize reach as well as accessibility. SubtitleBee is one such tool that can make adding Spanish subtitles, or any other language, for that matter, super simple.
Adding subtitles to your content increases the wormhole of viewer watch time, and there is no doubt that subtitles keep your native person on board with your video content. Even if you’re not reaching a global audience, subtitles ensure your message is reaching a wider demographic. But if you want to reach a wider audience of 600 million Spanish speakers across the world, you need to include subtitles in a more global language like Spanish.
Why Add Spanish Subtitles?
Spanish subtitles make your video more accessible to viewers who either prefer or rely on them and extend the reach of your video — particularly beneficial when you factor in the over 500 million Spanish speakers worldwide.
With subtitle generator, you can genrate Spanish subtitles to your video, or translate existing English subtitles into Spanish. So, let’s look at a step-by-step guide to create more inclusive and engaging videos.
How to Add Spanish Subtitles Using SubtitleBee
Step 1: Login to Subtitlebee.com
- Go to the website SubtitleBee and click on the Login button at the top right side corner of your screen.
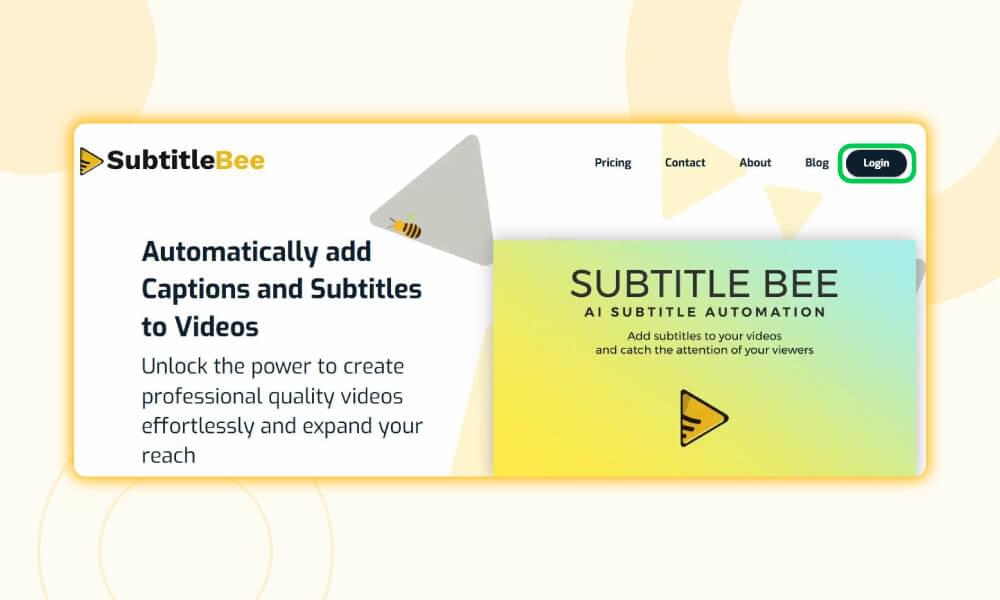
- Enter the email and password to your account.

- If you do not have an account on Subtitlebee yet, don’t worry, simply click on the “Start for Free” button. Jump to Step 5 of this guide and you are good to go.
Step 2: Upload Your Video
- Click the “Upload new file” button.
- Once you click it, below below-mentioned page appears asking you to select the existing language of your video. The YouTube video that I am using is in English language, so I am selecting “English” here, you can select as per your video.
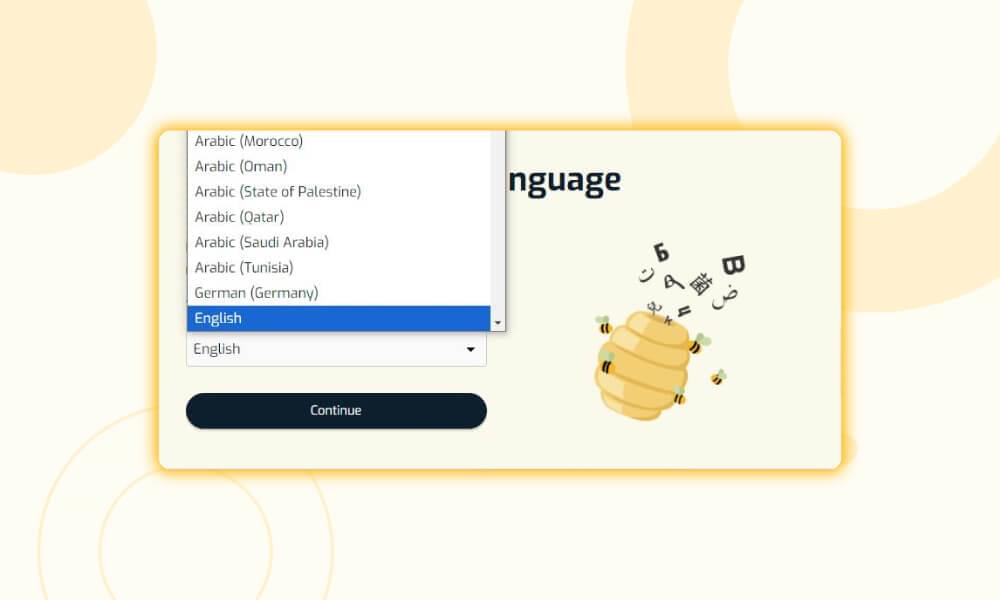
- Once you have selected the language, this page brings you two different options.
Upload from device: If you have the video or mp3 audio saved in your device then you can browse it or simply drag and drop it in this box.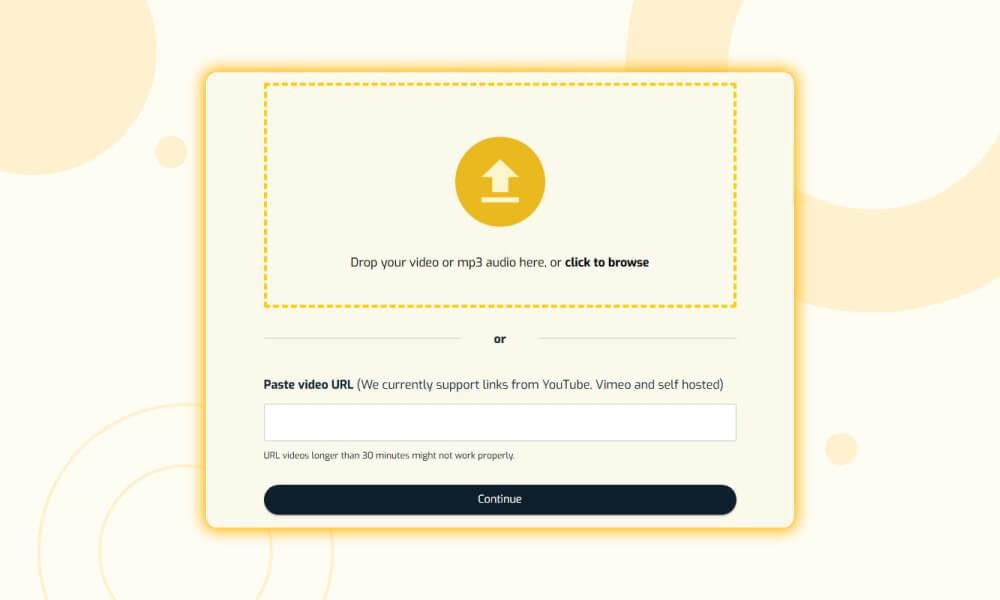 Upload from Web: Otherwise, if you are using a video from YouTube, Vimeo or from self-hosted web locations then you need to provide the web link here.
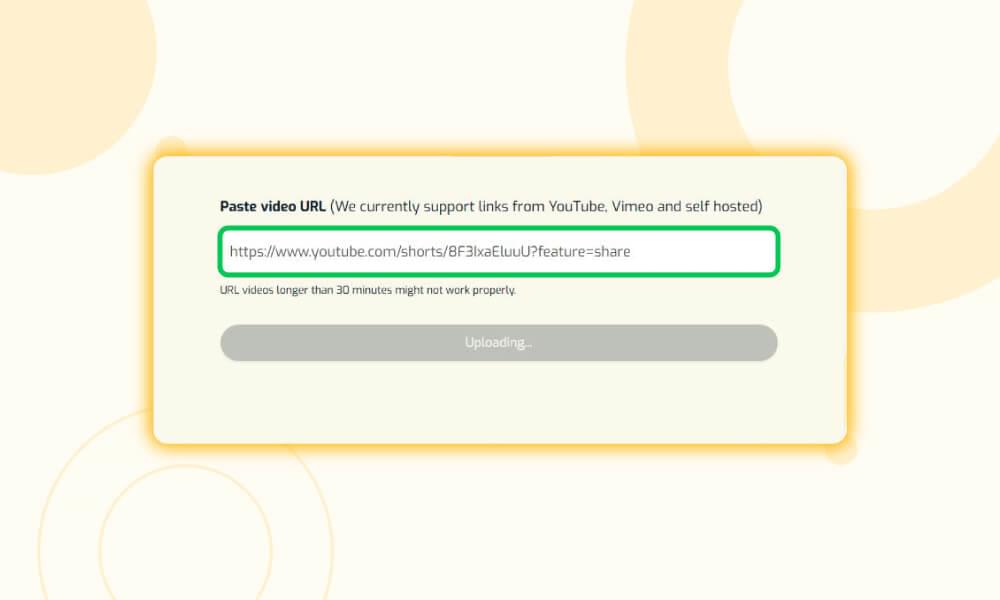
- Press the “Continue” button.
Step 3: Generate and Customize Spanish Subtitles - Subtitles Tab
“Subtitles” tab is where you get pre-generated subtitles for the default language of your video and this is where you can customize them.
Before we translate English subtitles to Spanish subtitles, check and edit the auto-generated subtitles for any errors so that they are translated accurately. Editing for accuracy ensures a seamless translation into Spanish.
The time stamps let you know the time when something is being said in the video. Use time stamps to verify subtitle alignment with the video content.
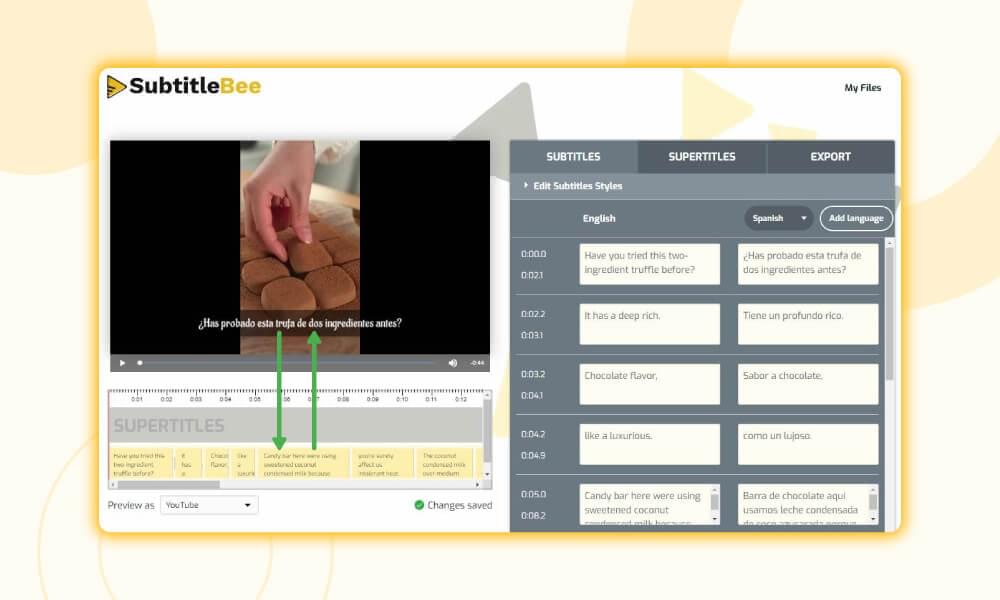
Now to add Spanish subtitles to your video, click the “Translate Subtitles” option.
The next window will give you a list of languages that Subtitlebee supports.
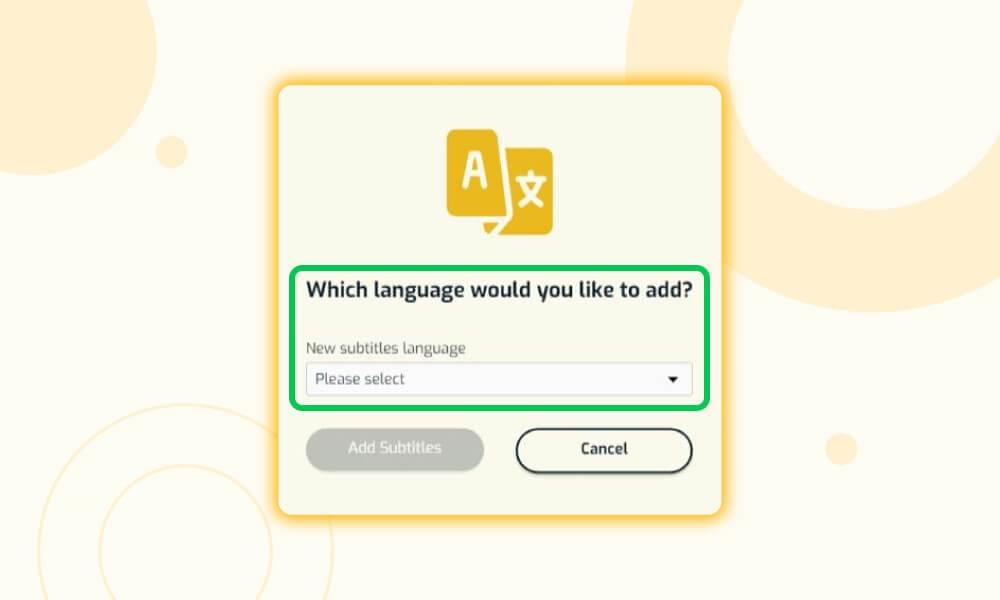
Select “Spanish,” and Voila, Spanish subtitles are added. You will find the subtitles appear in two columns, one in the previous language and the second in Spanish.
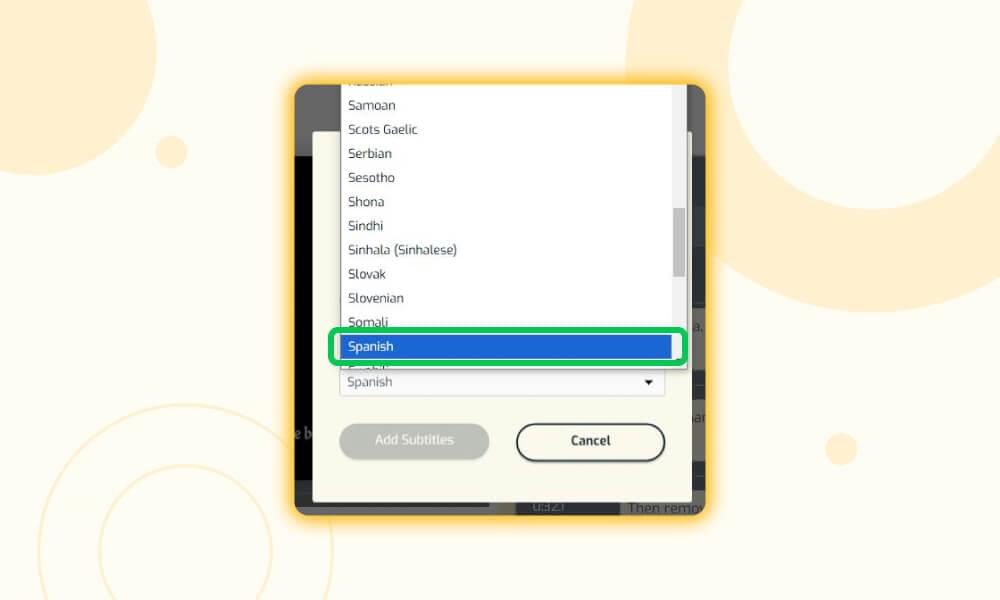
Here you go, you can see both English and Spanish subtitles added to video now.
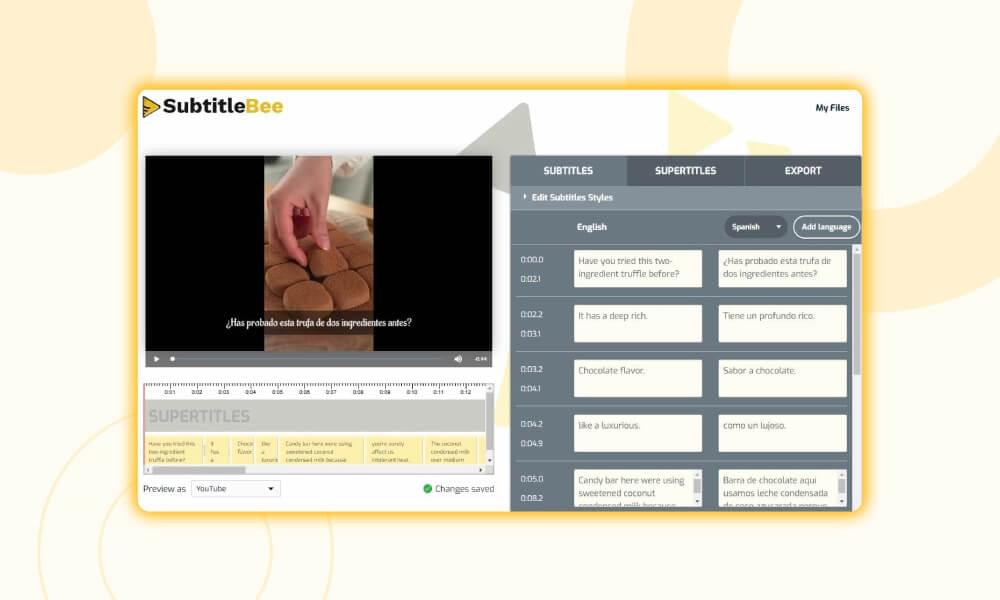
- Now that the Spanish subtitles are added to our English video, let’s try the “Edit Subtitle Styles”. Here you get multiple options for the fonts and styles of the text. And where you prefer the text to appear on a video screen.
- You can also change the colour and background of the text.
- The “Add Language” option lets you add subtitles for multiple languages. I am selecting Chinese just for an example.
And here Chinese subtitles appear. - Click the language drop-down and select Spanish to change back to Spanish subtitles.
Step 4: Supertitles Tab
Next up is the “Supertitles” tab where you can add a Supertitle to your video. Supertitles are used for better SEO ranking and user engagement.
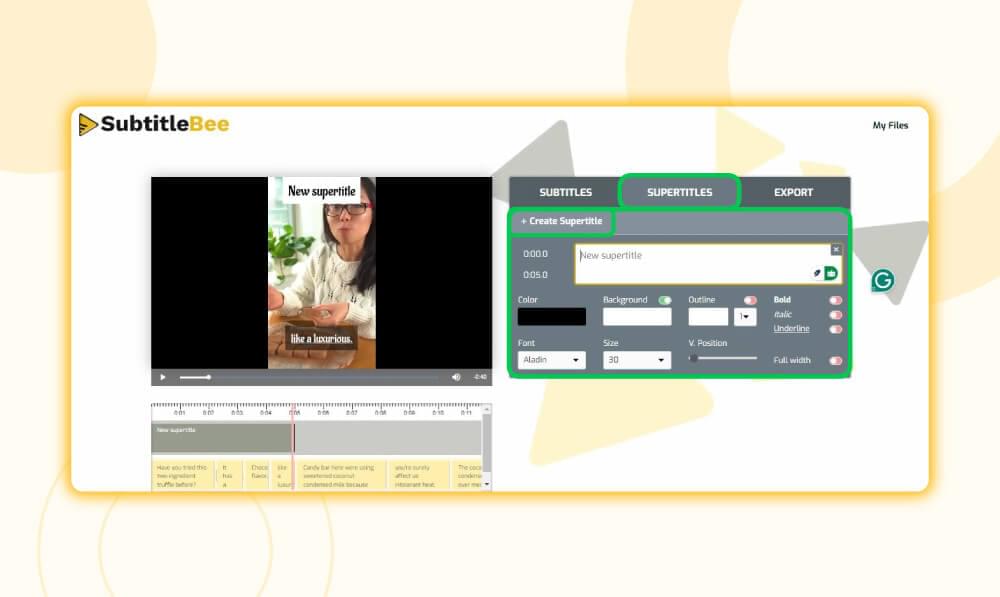
Supertitles do not stay throughout the video. You can choose the time when you want your overlay text to appear by using the timestamp bar under the video.
- Type the Supertitle in the box.
Again Subtitlebee gives you multiple customization options for Supertitle. You can change the font, size, background and position of the supertitle.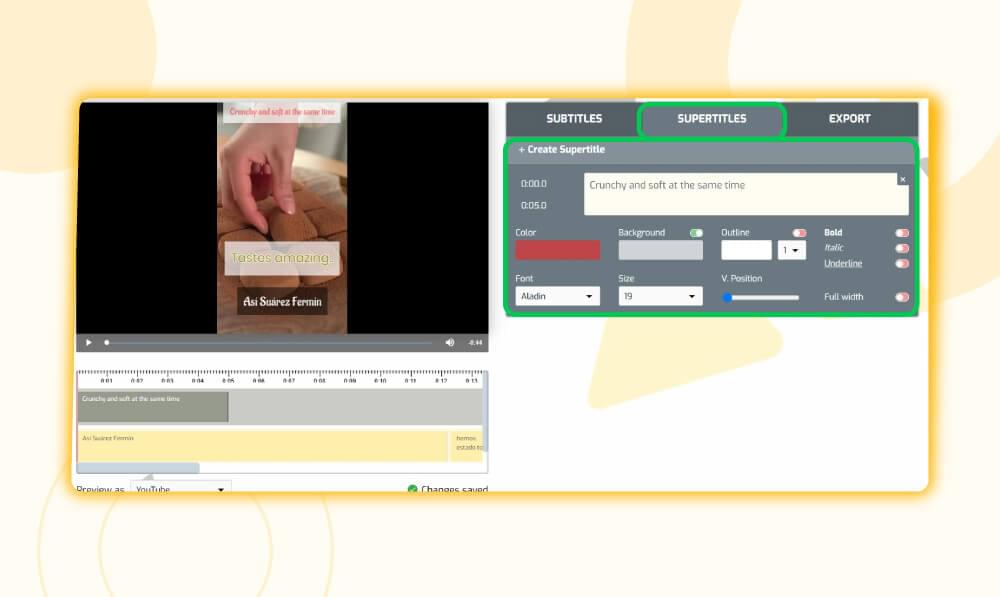
- Play the video to check the changes made in supertitles.
Step 5: Export Tab
The last tab is the “Export” tab. This is where you name your video, add your logo sign, and format type before you export the final video.
Enter the project name.
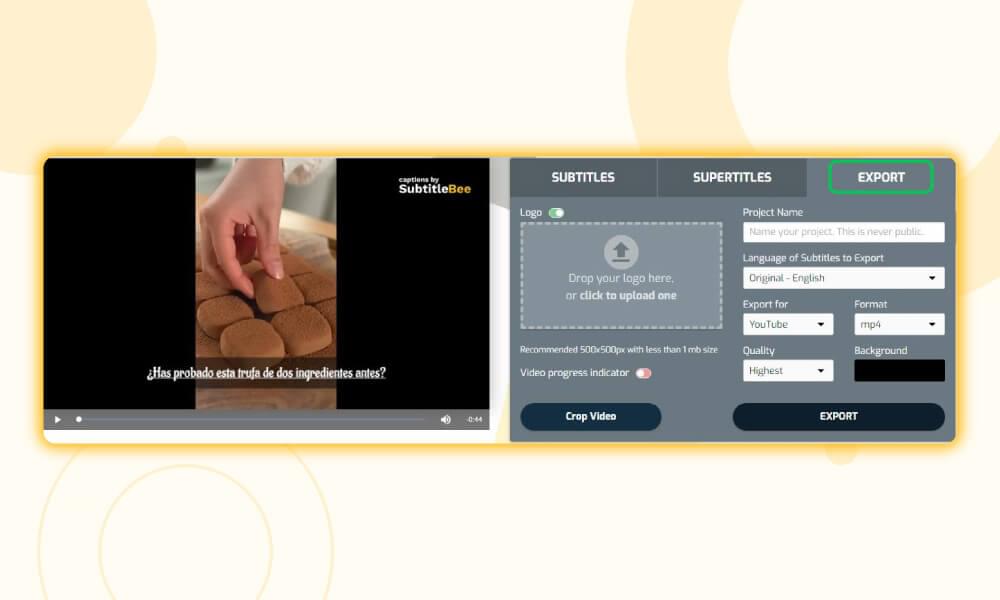
Select “Spanish” in “Language of Subtitles to Export”. This will export and save the Spanish subtitles with your video.
Use “Crop Video” button if you need to crop a part of video.
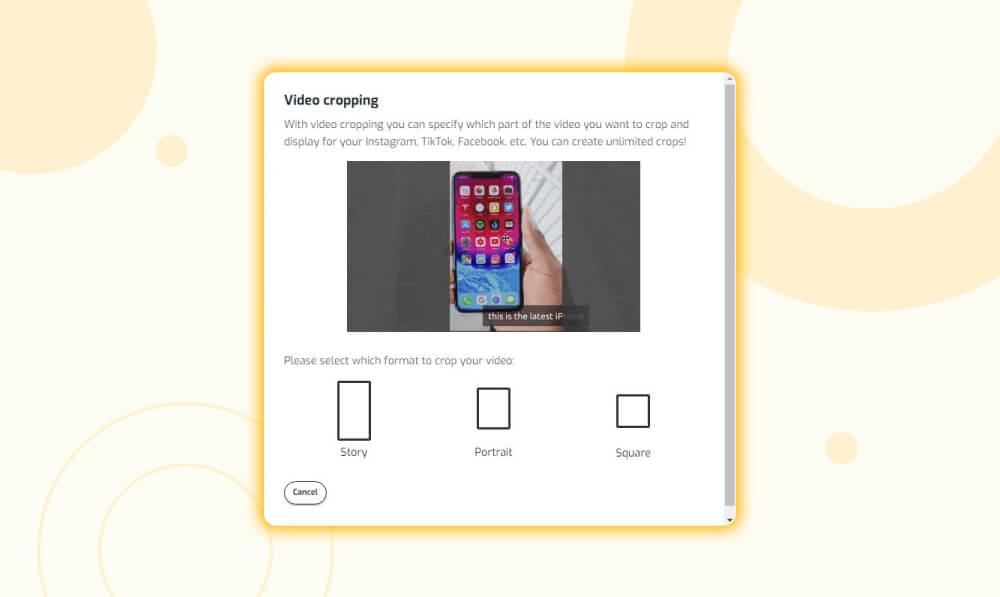
The Logo button lets you have “captions by SubtitleBee” logo on your video. Looks colourful, right 🙂
Use “Format” drop down where Subtitlebee lets you save in mp4, avi, and mov format types. Choose the video quality, video sizing and the language of subtitles you need to export. I’m choosing spanish.
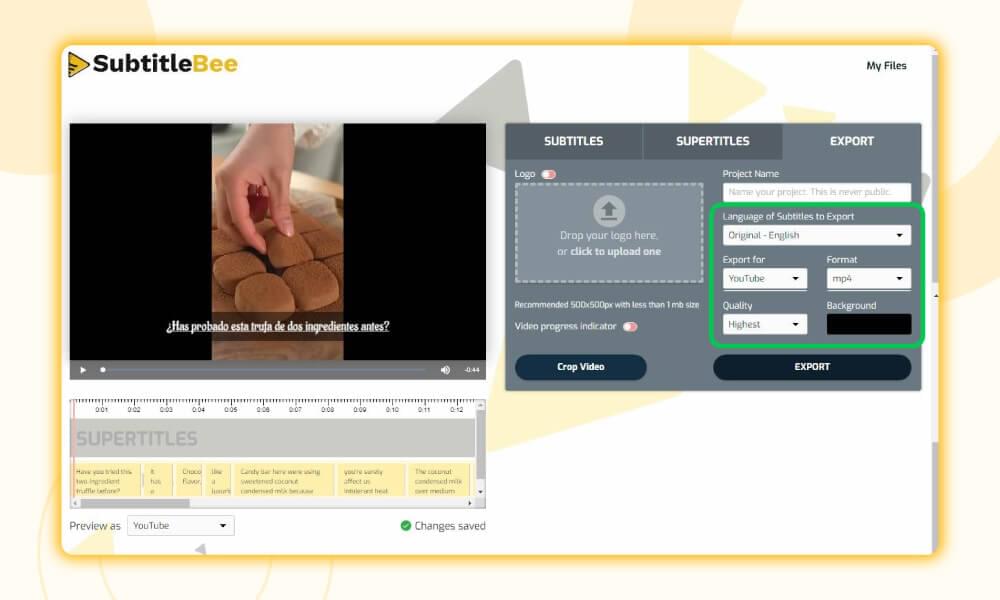
Once satisfied with all the changes needed, press “Export” button.
Step 6: Download from My Files
The file is exported and sent to My Files page. This is where you can:
- Download the video in your preferred format.
- Download transcript: You can download the file in SRT, TXT, ASS and VTT file formats.
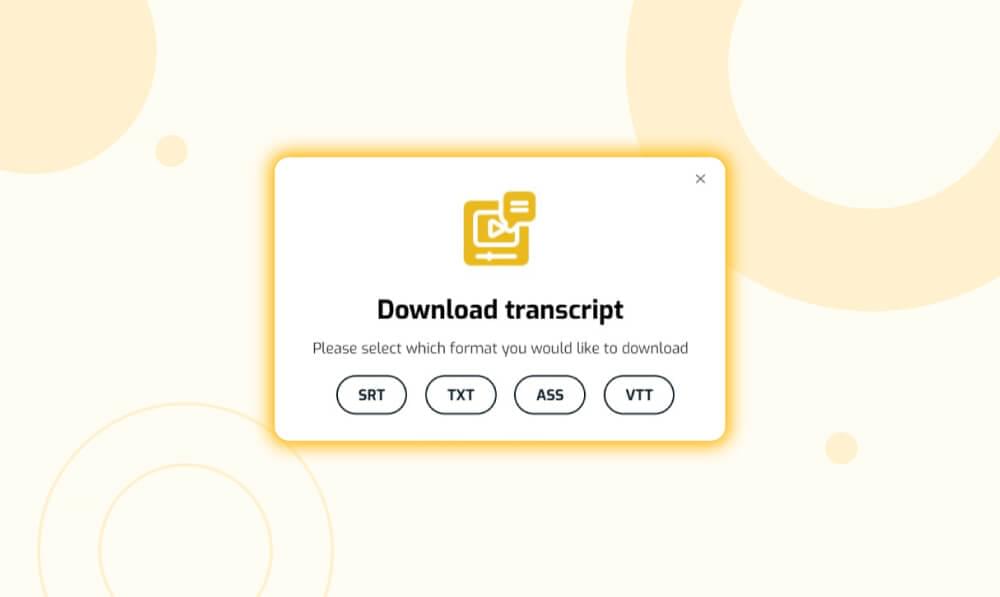
- Export New Language: this is helpful when you have already added multiple languages for the subtitles like we added the Chinese language. Click this button and it will take you to the “Export” tab of the dashboard.
Change the language in “Language of subtitles to Export”. And select “Export”. You will come back to the My Files page. - Duplicate: If you forgot to add another language for the subtitles then use this option.

- Hover over the downloading options, and you will see a tiny “Duplicate” option above the delete button. Press it, and it will take you to the “Subtitles” tab.
- Here, add the language of your preference in “Add language” and then go to “Export” tab.
- Select the newly added language in “Language for subtitles to export” and click export.
You will be taken back to the My Files page to download the video.
With these simple steps in Subtitlebee, you can add subtitles to video or audio file.
Conclusion
A great video drives greater engagement across platforms, and adding perfect subtitles is a part of making a highly entertaining video. By using accurate and well-synced subtitles, using a video caption generator your videos become more inclusive and attract a broader audience. Take the next step to elevate your video content by adding Spanish subtitles with SubtitleBee today!
Related Read:
How to add subtitles to video
How to add captions to reels
How to turn on captions on Tiktok
How to Turn On Subtitles on Paramount Plus
FAQs
How do I add subtitles directly to a video?
Use the .srt file of the subtitles in a video editor that can overlay this file onto the video. This will embed subtitles into a video permanently.
Can YouTube add Spanish subtitles?
Yes. Pause the video that you’re playing. Tap Captions. Select the language that you want captions in.
How do I add subtitles to a video in VLC?
Using the VLC media player, open the media file. Go to “Subtitles” and select “Add Subtitle File”. Upload the subtitle file.
Can you automatically add subtitles to a video?
Tools like SubtitleBee help you create subtitles automatically. The subtitles can be directly added to the video or downloaded as a raw subtitle file.
Can I add Spanish subtitles to an English video automatically?
Yes, Subtitlebee automatically generates and translates English subtitles into Spanish with minimal effort.
What if I need to edit my Spanish subtitles after export?
Subtitlebee allows re-importing and editing existing subtitle files for corrections or updates.
Is Subtitlebee compatible with YouTube links?
Absolutely! You can paste YouTube links directly into Subtitlebee for subtitle generation.
How accurate is the auto-translation to Spanish?
The translation is generally accurate, but reviewing and editing is recommended for context-specific phrases.
Can I save videos in other formats like avi or mov?
Yes, Subtitlebee supports various formats, including mp4, avi, and mov, for exporting your subtitled video.
Add and translate your subtitles to more than 100 languages with high accuracy


