



video tutorials for social media
How to Add Subtitles to YouTube Videos (3 Easy Ways)
YouTube already generates captions for most uploads, so why does anyone still search for how to add subtitles to YouTube videos? Because the automatic ones are often late, misspell names and product terms, and are missing entirely on some videos. Good subtitles are one of the cheapest ways to keep viewers watching, and this guide shows every way to add them: YouTube’s own tools, an accurate SRT file from a YouTube subtitle generator, or subtitles burned into the video itself.
Why Subtitles Matter on YouTube
Subtitles do three jobs at once on YouTube.
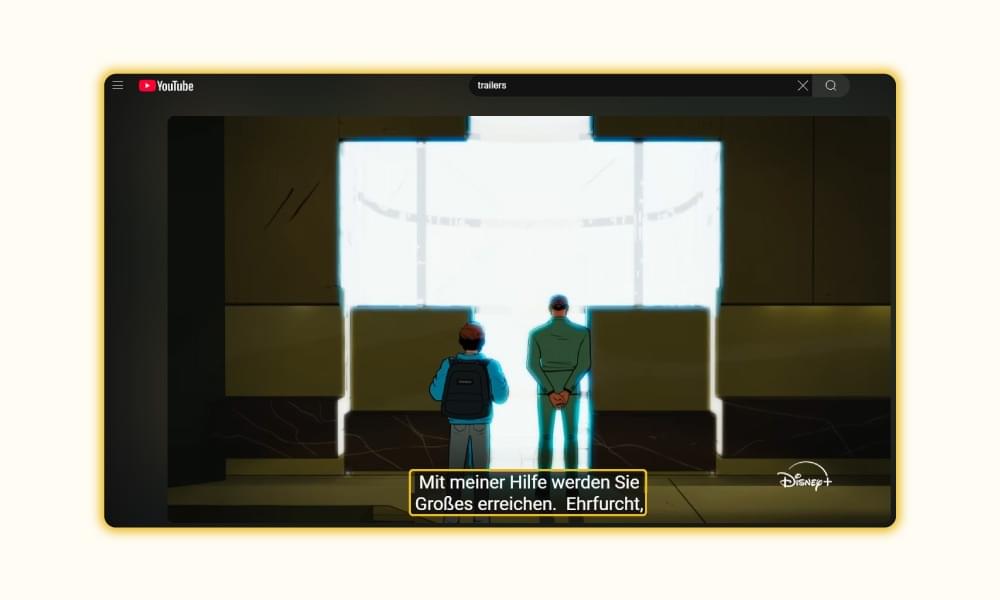
- They keep muted viewers. A large share of mobile viewing happens with the sound off, in feeds, in public, or next to someone sleeping. Subtitled videos keep those viewers past the first few seconds.
- They make your video searchable. YouTube indexes uploaded subtitle files, so the words in your video can help it surface for the queries people type. Auto-generated captions carry less weight, and if they misspell your keyword they help nobody.
- They open the video to more people. Deaf and hard-of-hearing viewers, non-native speakers, and anyone watching in a noisy place all rely on subtitles. Add a translated track and the same upload works in another language.
There is also a quality signal. Watch time drives the YouTube algorithm, and subtitles that arrive on time and read cleanly hold attention. Captions that lag two seconds behind the speaker do the opposite.
Three Ways to Add Subtitles to a YouTube Video
| Method | Best for | Accuracy | Effort |
|---|---|---|---|
| YouTube automatic captions | Quick coverage on every upload | Fair; needs a proofread | None to turn on, moderate to fix |
| Upload an SRT or VTT file | Accurate, searchable, toggleable subtitles | High if generated with a good tool and checked | Low with a subtitle generator |
| Burn subtitles into the video | Shorts, clips reposted to other platforms, styled captions | High | Low with a subtitle generator, plus re-upload |
Most channels end up using two of these. Upload an SRT file to the long-form video so viewers can toggle subtitles, and burn styled captions into the Shorts cut of the same footage. The sections below walk through each method in the order most people try them.
Method 1: Turn On YouTube Automatic Captions
YouTube uses speech recognition to create automatic captions in a growing list of languages, including English, Spanish, Portuguese, French, German, Italian, Dutch, Russian, Japanese, Korean, Hindi, Indonesian, Turkish, Vietnamese and Ukrainian. They usually appear a few minutes to a few hours after the upload finishes processing.
You do not have to switch anything on. As long as the video language is set correctly in YouTube Studio, auto-captions are generated for eligible videos. Here is how to confirm the language and find the subtitles panel.
- Open YouTube Studio and click Content in the left sidebar.
- Click the video you want to subtitle to open its details.
- On the Details page, scroll to Show more and set Video language to the language spoken in the video. This is the single most common reason auto-captions never appear.
- Click Subtitles in the left sidebar, or use the Subtitles row under Video elements during a new upload.
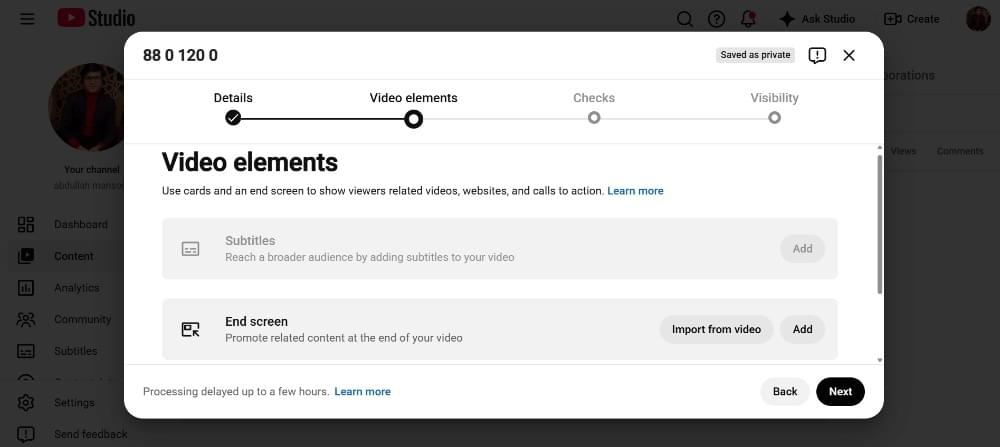
- Once processing finishes, you will see a row labelled with your language and Automatic in the subtitles list. Viewers can already turn these on from the CC button.
Automatic captions are a safety net, not a finished product. Speech recognition struggles with names, brand terms, acronyms, accents, music beds and crosstalk, and it adds no punctuation in some languages. Treat the automatic track as a first draft and fix it with one of the two approaches below.
Fix Automatic Captions in the YouTube Editor
If the automatic track is mostly right, edit it in place.
- In YouTube Studio, open Subtitles and find the row marked Automatic.
- Click Duplicate and edit. YouTube copies the automatic track into a new, editable track and leaves the original untouched.
- In the editor, click any caption line to correct the text. Use the Edit timings toggle to nudge start and end times, and the video preview on the right to check the result.
- Click Publish. The corrected track replaces the automatic one for viewers.
This works for short videos with clean audio. On a 20 minute video with a dozen technical terms, retyping in YouTube’s editor gets slow, and you cannot easily style, translate or reuse the result. That is when generating subtitles outside YouTube pays off.
Method 2: Upload an SRT File Made With a YouTube Subtitle Generator
The most reliable way to add subtitles to a YouTube video is to create an accurate subtitle file first and upload it. Viewers can toggle it on and off, YouTube indexes the text, and you keep a file you can reuse on other platforms or translate later.
Any AI subtitle generator that exports SRT or VTT will work. The steps below use SubtitleBee, which generates subtitles at around 95 percent accuracy from the audio and lets you correct the rest in a browser before exporting.
Step 1: Upload Your Video
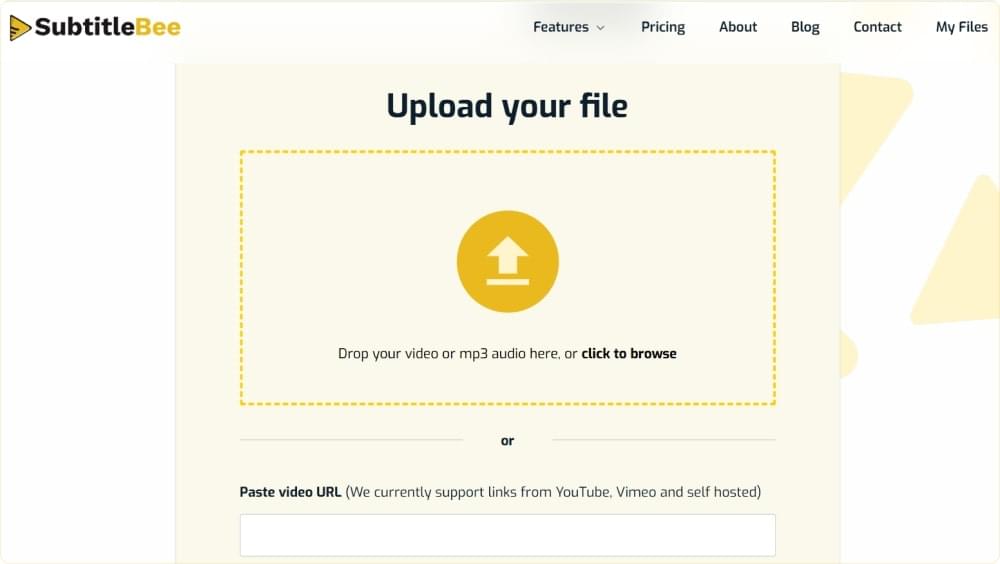
Sign in, click Upload, and drop in the same file you uploaded to YouTube. MP4, MOV, WMV, AVI and WebM are all accepted. Use the original export rather than a re-download from YouTube, since the timing has to match the published video exactly and re-encoded downloads sometimes shift by a frame or two.
Step 2: Choose the Spoken Language
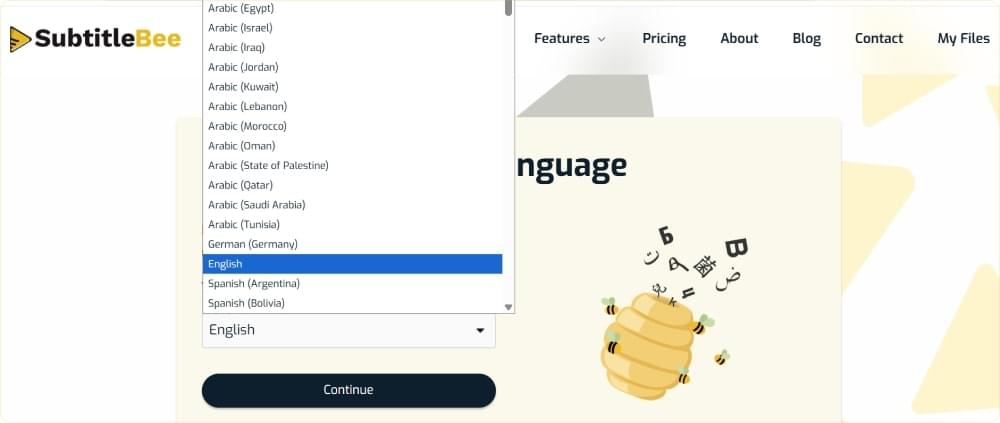
Pick the language spoken in the video. Getting this right is what keeps accuracy high; the wrong language produces confident nonsense. Leave translation for later, after the source subtitles are checked.
Step 3: Proofread and Fix the Subtitles
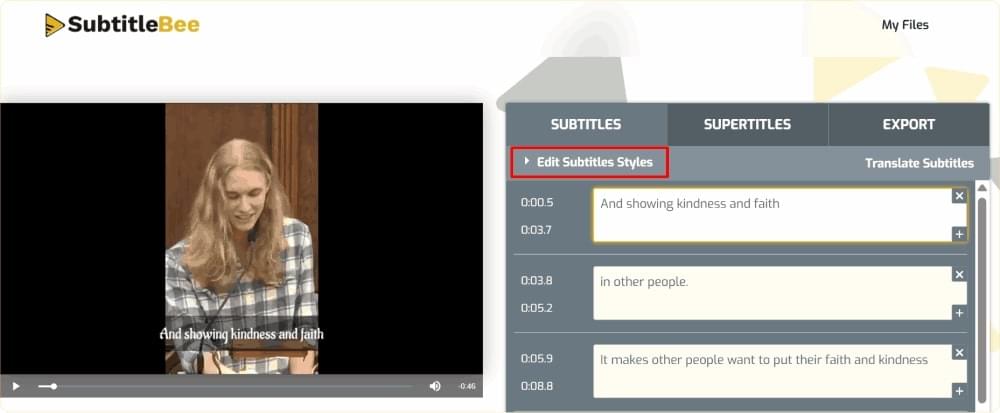
After a few minutes the transcript appears next to the video, split into timed lines. Play it through once at normal speed and correct as you go. Focus on the things speech recognition gets wrong most often:
- Names of people, places, products and channels.
- Acronyms and numbers, especially prices and dates.
- Homophones such as “their” and “there” that a spell checker will not catch.
- Lines that run longer than two rows on screen. Split them so they stay readable on a phone.
Step 4: Export the SRT File
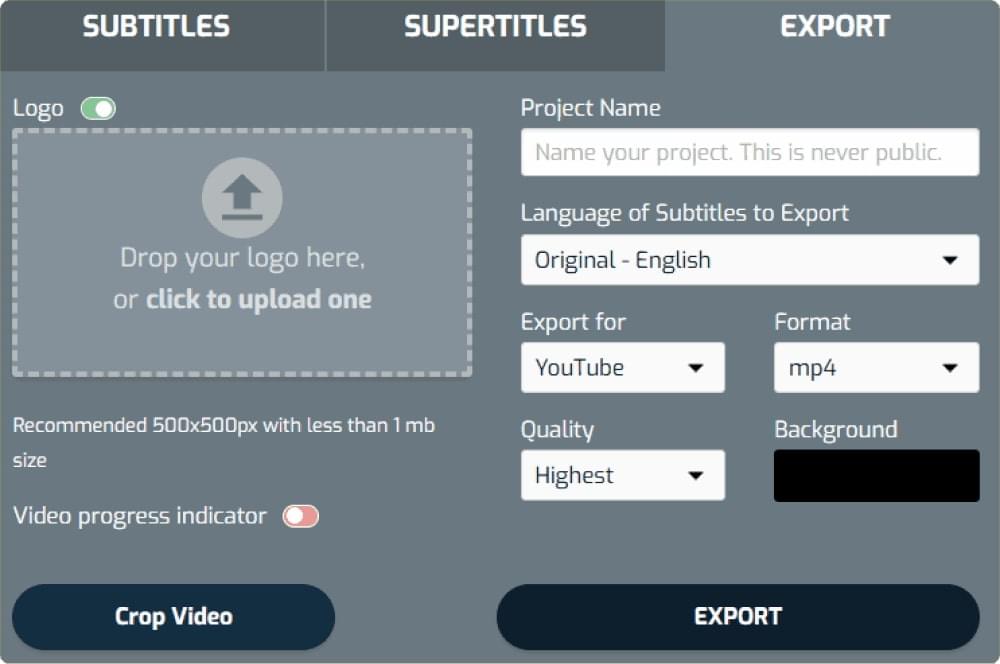
Open the export options and download the subtitles as .srt. VTT also works on YouTube, and SBV is accepted as well, but SRT is the format every other platform and editor understands, so it is the safest one to keep.
Step 5: Upload the Subtitle File to YouTube
- In YouTube Studio, open the video and click Subtitles.
- If the language you need is not listed yet, click Add language and choose it.
- Click Add in the Subtitles column for that language.
- Choose Upload file, select With timing, and pick your .srt file.
- Check a few lines in the preview, then click Publish.
The uploaded track appears instantly for viewers and takes priority over the automatic one. If an old automatic track is still visible, you can leave it; YouTube shows the published track by default.
Two things to know about the upload option. With timing expects a file that already has timestamps, which is what an SRT export gives you. Without timing takes a plain transcript and lets YouTube place the lines using its own speech alignment. That is a decent fallback if all you have is a script, but it only works for languages YouTube can auto-sync and it inherits any drift in the alignment.
Method 3: Burn Subtitles Into the Video
Burned-in subtitles, also called open captions or hardcoded subtitles, are part of the picture itself. Viewers cannot turn them off, which is exactly what you want for Shorts and for clips you will repost on TikTok, Instagram or LinkedIn, where feeds autoplay muted and the caption style is part of the look.
To burn subtitles in with SubtitleBee, follow steps 1 to 3 above, then style the text and export a video instead of a file.
- Open the subtitle style options and choose a font, size, colour and background. Bold sans-serif fonts with a dark outline or box survive busy backgrounds best. Our guide to the best subtitle fonts for your videos has tested combinations.
- Position the subtitles clear of the YouTube player controls at the bottom and, for Shorts, above the title and buttons that overlay the lower third of the screen.
- Export the video and upload the new file to YouTube.
The trade-off is that burned-in text is fixed. Viewers cannot switch languages or resize it, and YouTube cannot read it for search. For long-form videos, upload the SRT file as well so you get both. Our guide to hardcoding subtitles covers the format choices in more depth, and if you are captioning vertical video, see how to add captions to YouTube Shorts and the correct YouTube Shorts aspect ratio and dimensions.
Add Subtitles in Multiple Languages
Once you have an accurate subtitle track in the original language, extra languages are cheap to add, and each one opens your video to a new audience without recording anything.
There are two routes.
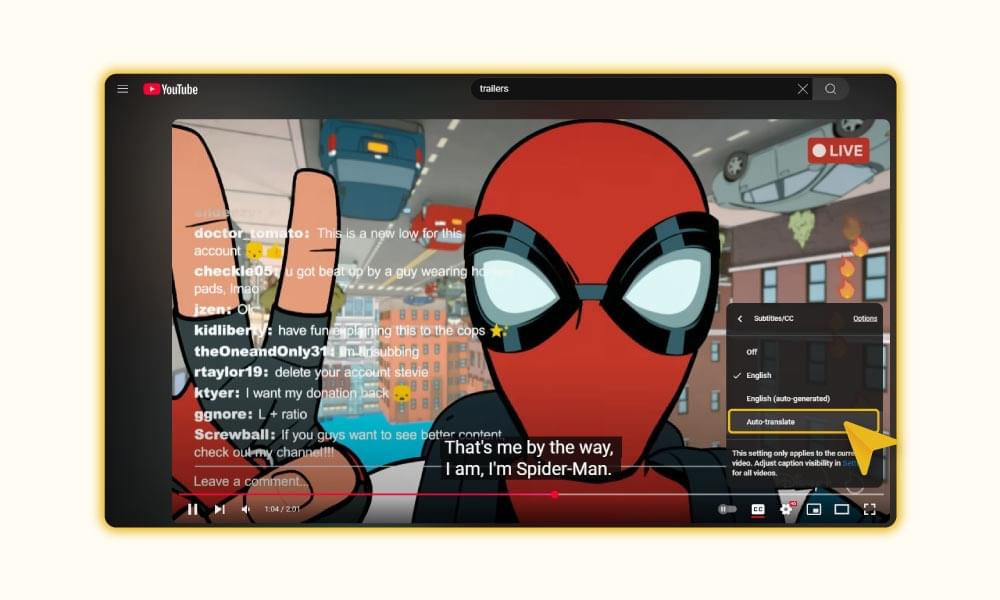
Let YouTube auto-translate. Viewers can open the settings gear, choose Subtitles/CC, then Auto-translate, and pick from over 100 languages. This costs you nothing, but quality is machine translation applied on top of whatever subtitle track exists, and it only appears when the viewer goes looking for it.
Upload translated subtitle tracks. In SubtitleBee, open the language menu above the editor, click Add language, and choose the target language. The subtitles are translated automatically, you can tidy any lines that read awkwardly, and you export a separate SRT per language. Then in YouTube Studio, click Add language for each one and upload the matching file. Translated tracks show up in the CC menu by name, and YouTube can index them, so a Spanish speaker searching in Spanish can actually find your video.
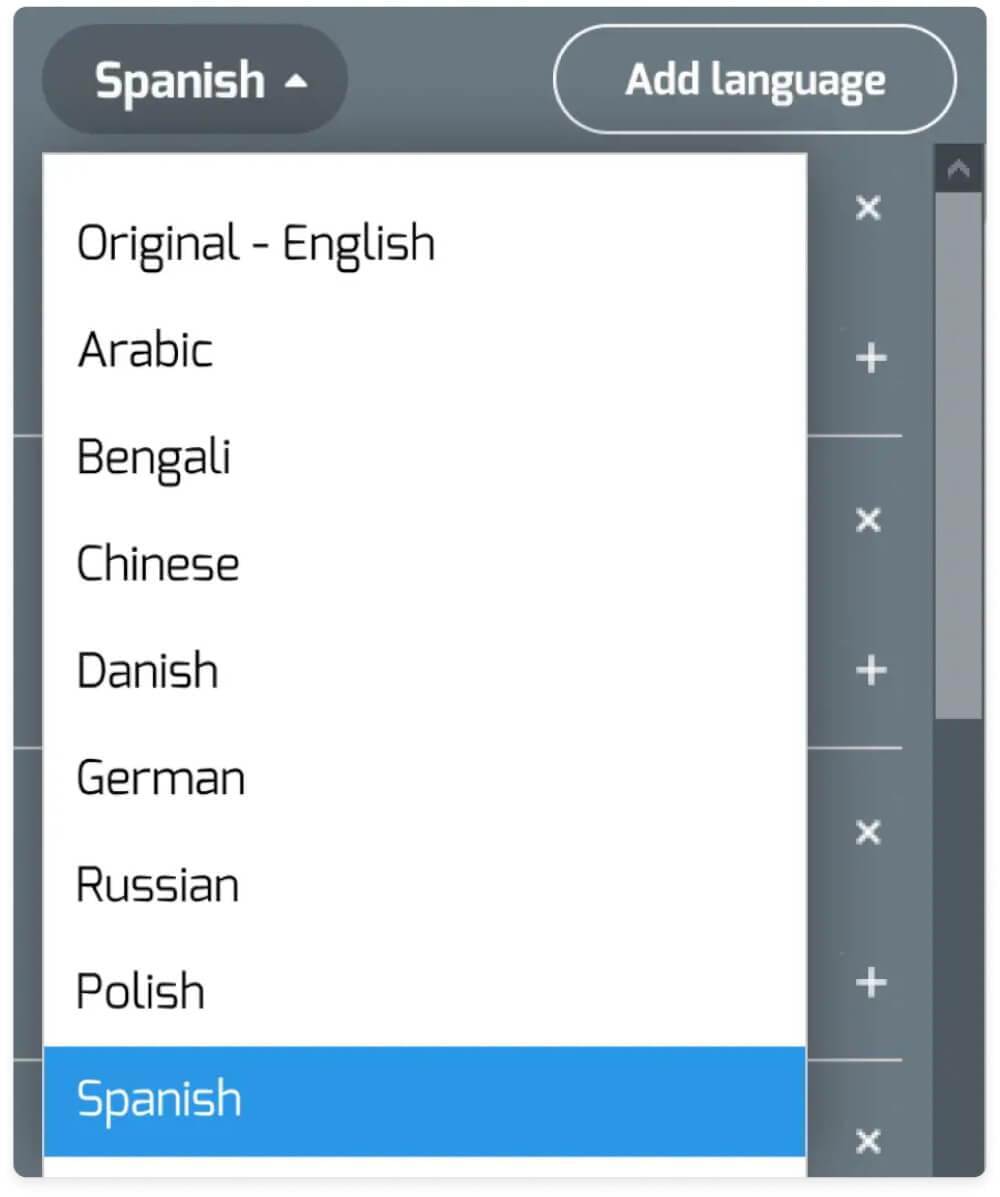
Translation on SubtitleBee covers 100+ languages on paid plans; see the multi-language subtitle translation page for the full list. For a step-by-step walkthrough of translating a whole video, including the audio, read how to translate a YouTube video.
How Viewers Turn Subtitles On and Off
If someone tells you your video has no subtitles when you know it does, the setting is usually on their side.
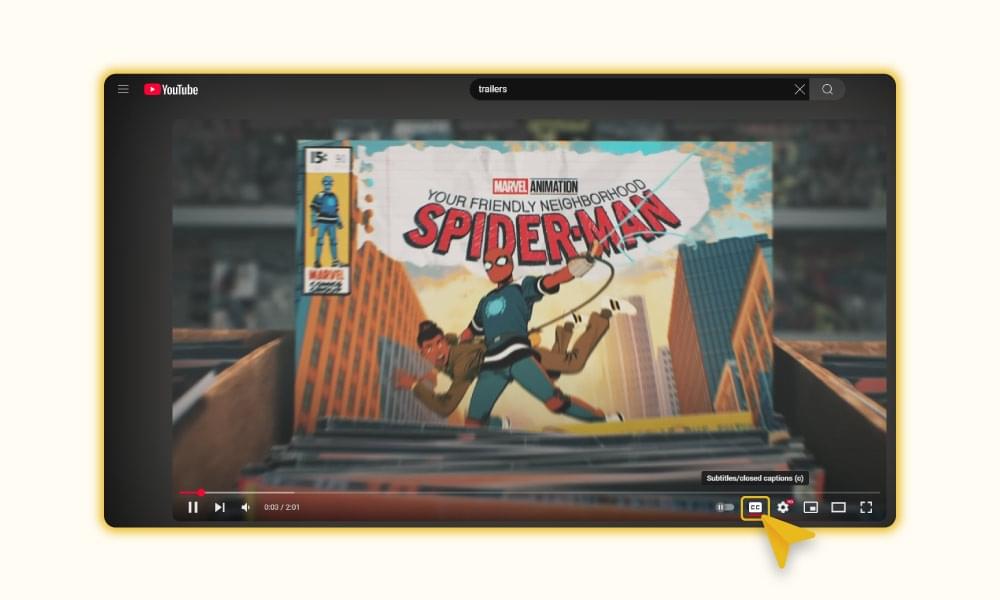
- Desktop: click the CC button in the player controls. Click the gear to change the language or open Options to change font size, colour and background.
- Mobile app: tap the video, tap CC at the top of the player, or tap the three dots and choose Captions.
- Turn them on for every video: on desktop, open Settings then Playback and performance and tick Always show captions. On mobile, the switch lives under Settings then Captions.
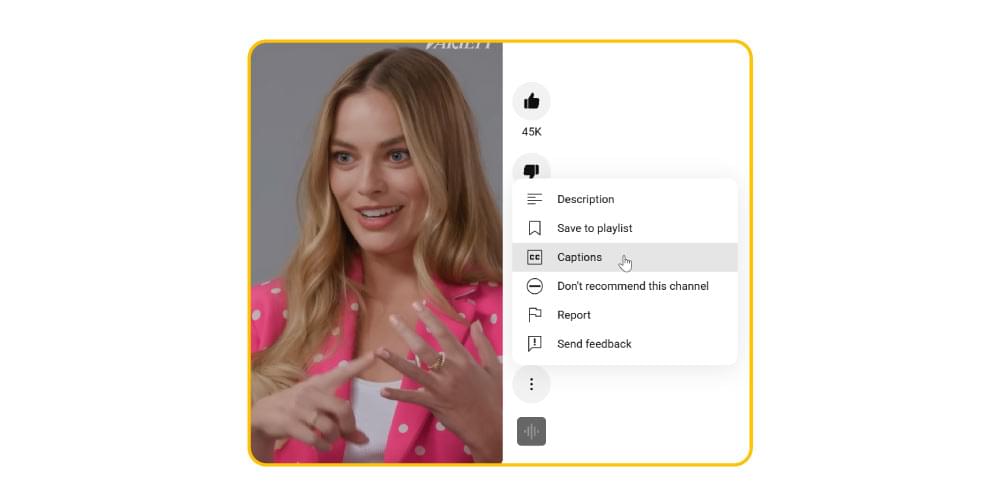
If the CC button is greyed out, the video genuinely has no track yet. Either auto-captions have not finished processing, the video language is unset, or the audio was not clear enough for speech recognition. Uploading an SRT fixes all three.
Viewers who want the text itself, for notes or quotes, can also copy it. See how to get the transcript of a YouTube video and how to download YouTube subtitles.
Subtitles or Closed Captions? What YouTube Means by Each
YouTube uses “subtitles” and “closed captions” almost interchangeably in its interface, but the difference matters when you write them. Subtitles assume the viewer can hear and only translate or transcribe the dialogue. Closed captions are written for viewers who cannot hear, so they also describe sound effects, music and who is speaking when it is not obvious on screen.
If accessibility is part of your goal, or you publish content for education or government where captions are required, write your track as closed captions: add cues like [applause], [phone ringing] and speaker labels. We break the two formats down fully in closed captioning vs subtitles.
Common YouTube Subtitle Mistakes
- Leaving the automatic track unedited. A misspelt product name in your own captions looks careless and undermines the search benefit.
- Uploading a file with the wrong offset. If you trimmed the intro after generating subtitles, every line arrives late. Generate from the final export.
- Lines that are too long. Keep each caption to two rows and roughly 42 characters per row so it fits on a phone without covering the picture.
- Text that overlaps the player. YouTube’s progress bar and controls sit at the bottom of the frame. Leave a margin, and on Shorts keep captions in the middle third.
- Forgetting the video language setting. Without it, no automatic captions and no auto-translate.
- Burning in subtitles only. Great for Shorts, but on long-form video you lose language switching and search indexing. Upload the SRT too.
- Ignoring readability. Thin fonts, low contrast and no background make captions unreadable in bright light. See how to make captions bigger on YouTube for what viewers can change and what you should set yourself.
Frequently Asked Questions
How Do I Add Subtitles to a YouTube Video I Did Not Upload?
You cannot edit someone else’s video, and YouTube retired community contributions in 2020. Your options as a viewer are the CC button, if the creator enabled captions or automatic ones exist, and Auto-translate for other languages. If you have permission to reuse the video, download it, run it through a subtitle generator, and publish your own subtitled version.
Can YouTube Automatically Generate Subtitles?
Yes. YouTube produces automatic captions for eligible videos in supported languages once the video language is set and processing finishes. They are useful as a starting point but usually need corrections, especially for names and technical terms.
Why Are There No Subtitles on My YouTube Video?
The usual causes are an unset or wrong video language, audio that is too quiet or music-heavy for speech recognition, a language YouTube does not auto-caption yet, or a very long video that is still processing. Uploading your own SRT file works regardless of all four.
How Do I Add Subtitles to a YouTube Video on My Phone?
The YouTube app does not include a subtitle editor. Open studio.youtube.com in your phone’s browser and request the desktop site to reach the Subtitles panel, or generate the subtitles with a browser-based tool and upload the SRT from a computer later. For Shorts filmed on your phone, the easier path is to burn styled captions into the clip before you upload it.
What Subtitle File Formats Does YouTube Accept?
YouTube accepts SRT, SBV, VTT, and several broadcast formats such as DFXP, TTML and SCC, plus plain transcript text files for auto-sync. SRT is the safest choice because every editor and platform supports it.
How Accurate Is a YouTube Subtitle Generator?
AI subtitle generators such as SubtitleBee reach around 95 percent word accuracy on clear speech. Background music, heavy accents, multiple speakers and specialist vocabulary lower that figure, which is why a quick proofread is always part of the workflow. For a comparison of tools, see our roundup of the best AI subtitle generators.
Do Subtitles Help YouTube SEO?
Uploaded subtitle files give YouTube a text version of your video that it can index, which helps it understand the topic and match more searches. Automatic captions carry less weight. Subtitles also lift watch time from muted viewers, and watch time is the stronger ranking signal.
Is It Free to Add Subtitles to YouTube Videos?
YouTube’s automatic captions and editor are free. Generating subtitles with SubtitleBee is free for videos up to 10 minutes with a watermark on the exported video; the SRT file itself carries no watermark. Paid plans start at $19 per month, remove the watermark and add translation. See the pricing page for the current limits.
Start Subtitling Your YouTube Videos
Turn on YouTube’s automatic captions so every video has something, then upgrade the videos that matter with an accurate SRT file and, for Shorts, burned-in captions that match your brand. The whole process takes minutes per video once the subtitle generator has done the transcription.
Upload your next YouTube video to SubtitleBee, correct the few lines that need it, and export the SRT and a captioned MP4 in one go. The free plan is enough to try it on a short video today.


Add and translate your subtitles to more than 100 languages with high accuracy
Our solution
SubtitleBee
Make your video understandable by using SubtitleBee for free
Start now for freeTop Articles

Getting Started with AI-Powered SubtitleBee

3 Effective Ways To Add Subtitles To Video Online Without Watermark
VEED vs. Kapwing: Which Subtitle Generator wins?
Kapwing vs. SubtitleBee: Which subtitling tool should you choose?

5 Top Verbit Alternatives for Transcription