
video tutorials for social media
How to Translate YouTube Videos: A step-by-step guide
A key ingredient to upscale your game In the YouTube world is to consider adding captions and subtitles under your videos in multiple languages, if possible. Now, the question that arises in mind is how to translate YouTube videos into English or any language. Keep reading till the end of this blog to learn how effortlessly you can translate a YouTube video in just 1 click!
YouTube has 2 billion active users monthly across the globe. For this reason this platform seems like an easy way to get visibility online. Every minute, over 500 hours of videos are uploaded on YouTube. Unfortunately, this lot of content isn’t always well captioned.
When it comes to the marketing of video content on YouTube or any social media platform, captions and subtitles are powerful aspects of the videos. Not only does it make your content accessible all over the globe, but it also engages more audiences and increases the reach and views of your YouTube videos.
Related Read: How get more views on YouTube
Under are some statistics related to Youtube views with Subtitles.
- As per the research study, the content creators who put captions and subtitles to their YouTube videos saw a 7.3% increase in views.
- The research study conducted by the Journal of the Academy of Marketing Science found that captions and subtitles in YouTube videos can improve brand intent and brand image.
- For obvious reasons, the statistics can be different or higher for people with disabilities.
If you’re looking to add subtitles or captions to your YouTube videos, you can use a few hacks to make the process easier. Here are six hacks that can help you get started:
Steps to Translate Youtube Videos using SubtitleBee
If you love the creative process and the satisfaction of putting together a great finished product but hate all of the little technical details that can trip you up—SubtitleBee is the answer for you.
Here is how you can use SubtitleBee to translate YouTube videos that are fun.
Here is how you can see how SubtitleBee makes translating YouTube videos make so fun.
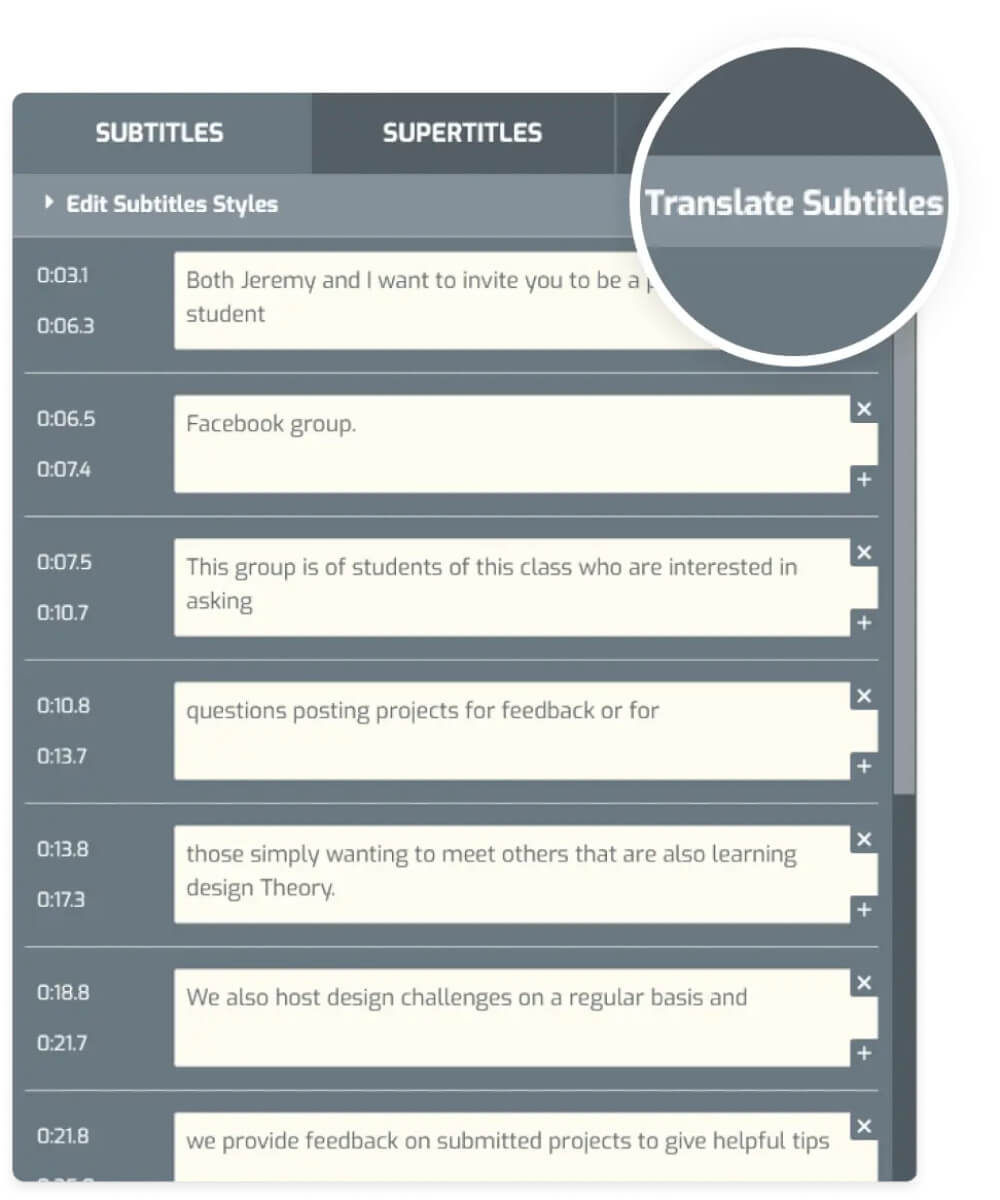
- Go to SubtitleBee’s website and click on the Translate Subtitles button.
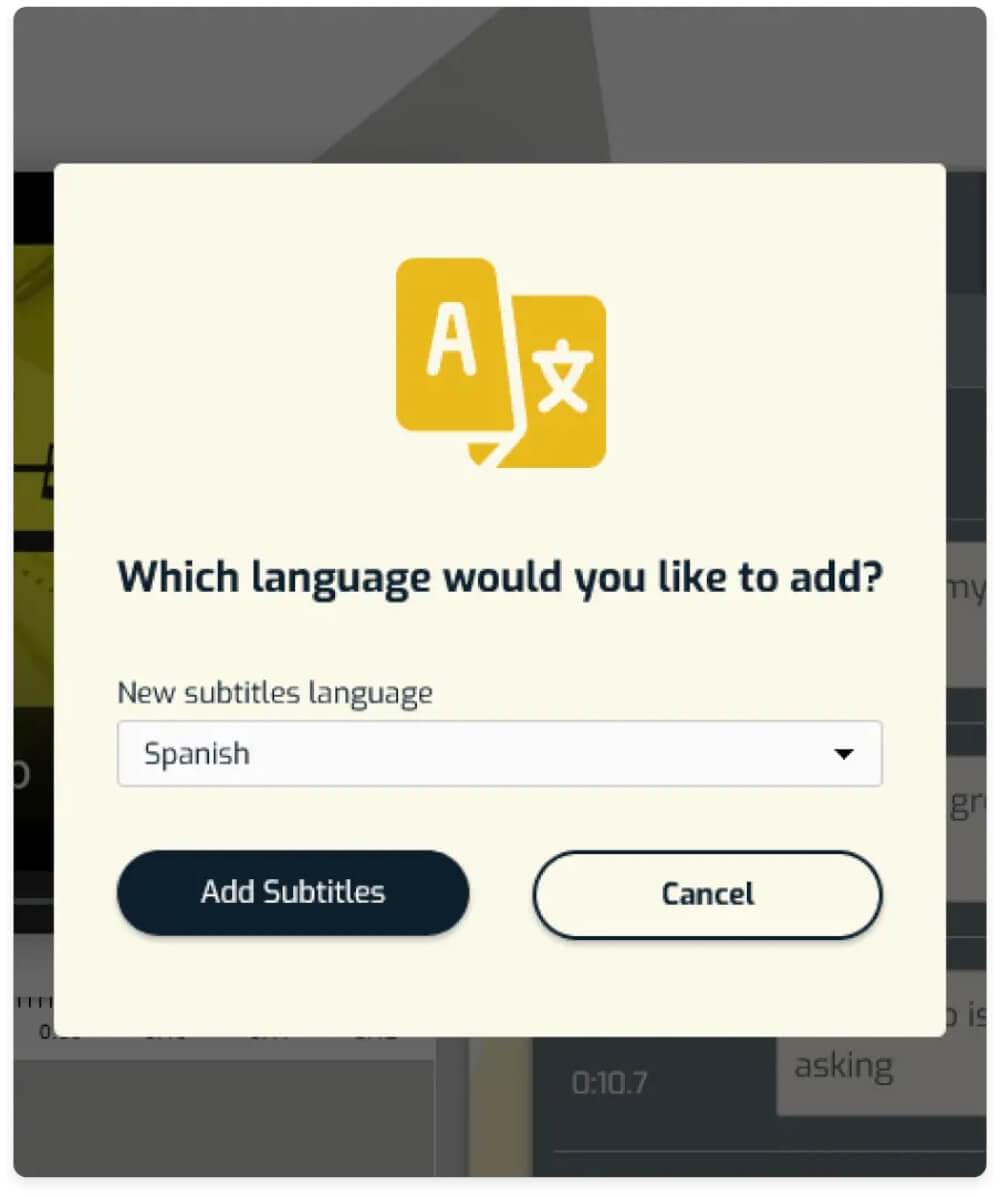
- Let SubtitleBee take action on your file. It will take a minute. It will ask you to pick the language of your choice.
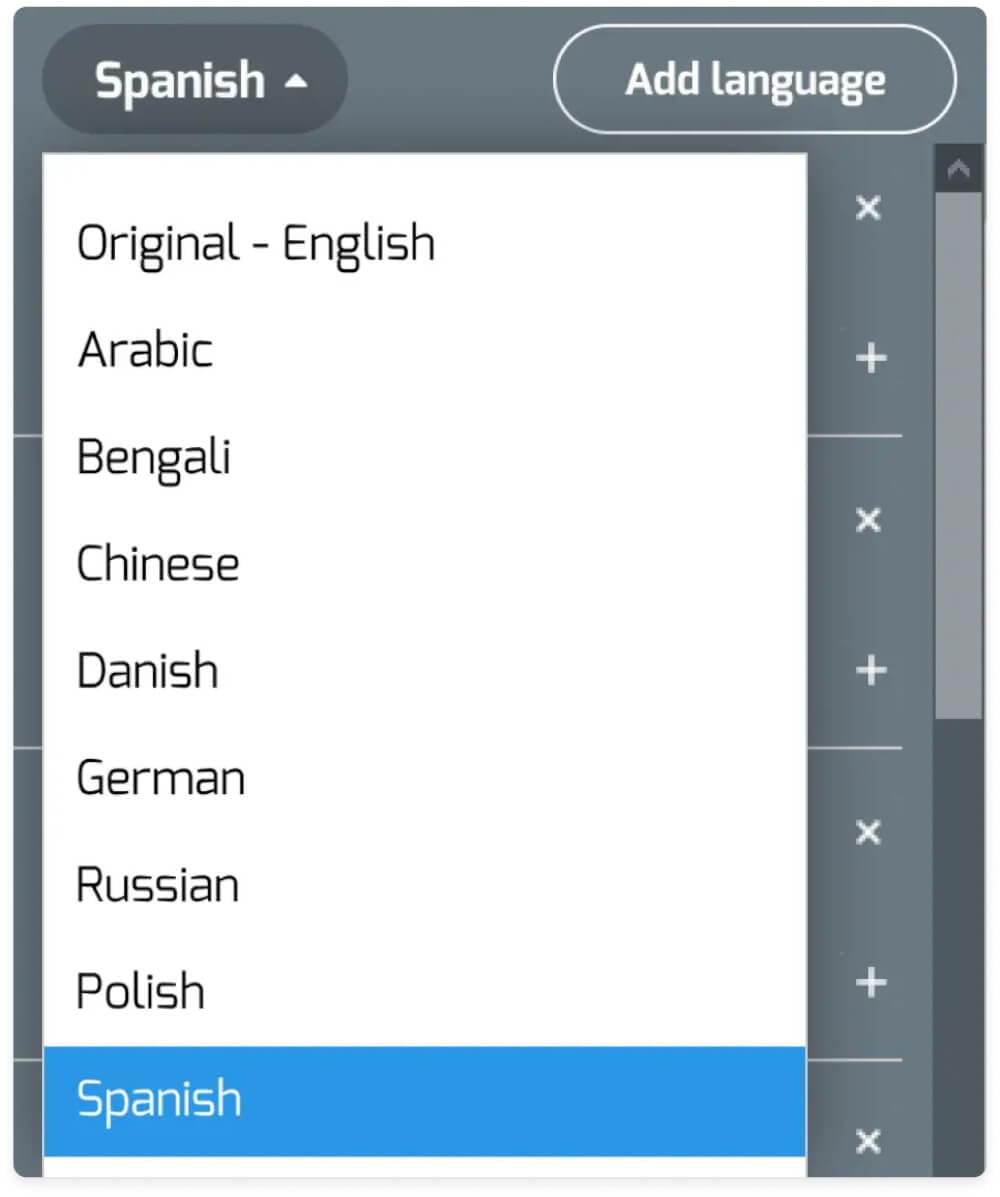
- It will open the catalogue to 120 different languages for you to pick the desired language.
- Once you have selected the language, it will start processing with translating captions. It will also show you a statistics preview of the entire work for you to view and analyze, compare, and make adjustments.
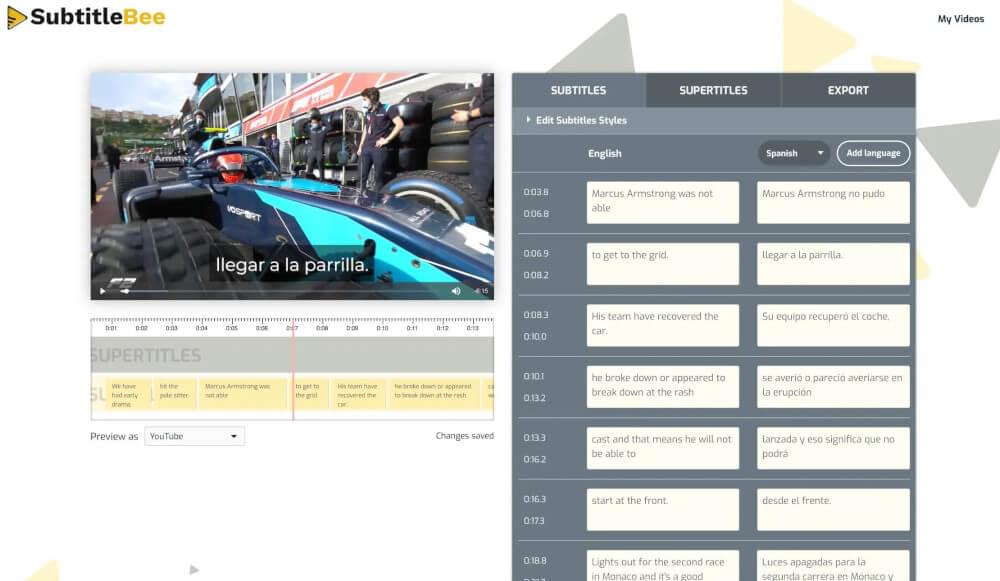
- Once it completes processing, SubtitleBee will allow you to download the generated video multiple times with different subtitles.
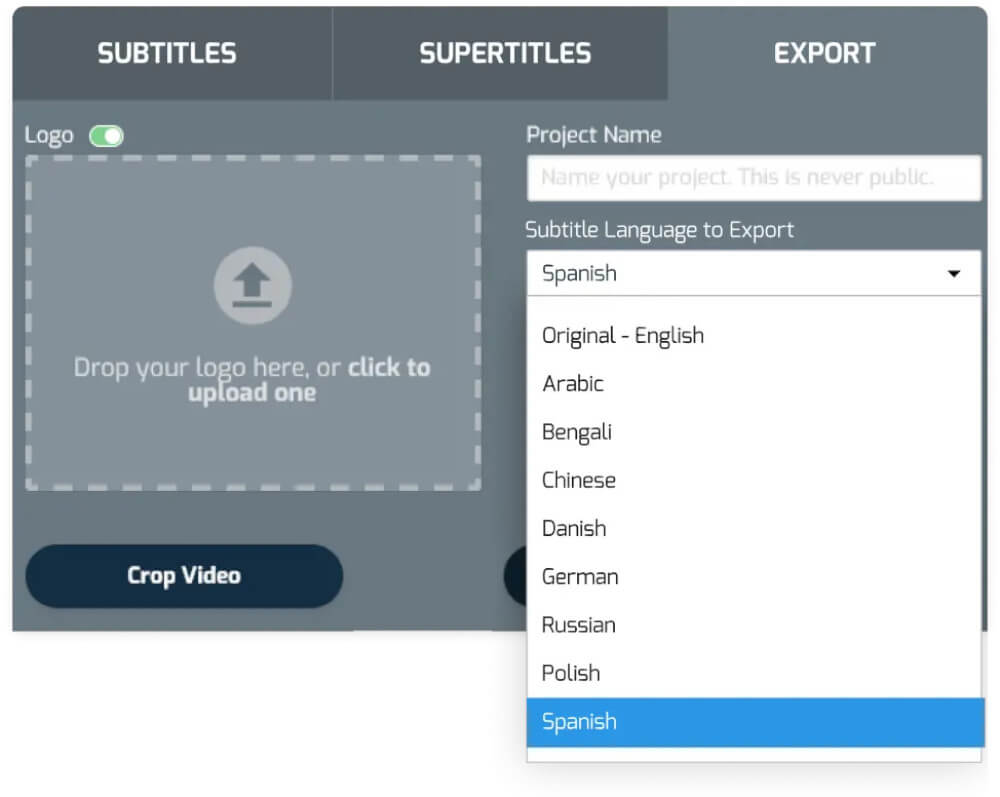
- You can download these videos anytime and as many times.
SubtitleBee is a caption generation tool that can translate captions in 120 languages. It allows free translation of captions for videos of 1GB up to 10 minutes with five free fonts. It is also considered one of the best and most accurate translators of English or any desired language due to its multilingual feature.
Check out their price plan; they are cheaper and have multiple outstanding features.
How to translate YouTube Video in simple steps?
There are several ways to translate YouTube videos to create captions in multiple languages. To use this feature, your video must have an original caption file.
Once you upload the caption file, you are ready to translate!
Here’s how to do it:
- Go over to your YouTube Studio
- From the menu on the left, click the Subtitles tab
- Choose the video you want to translate
- Afterwards, you’ll be asked to choose the language and confirm
- Select Add Language and choose the desired language
- Under “Title & Description,” click Add
- Write the translated title and description, and click on Publish!
YouTube auto-translation features are great free help if you run tight on the budget. However, they are good at getting the job done, but they are not perfect. Don’t expect them to be 100% accurate - just use them as a way to get a general idea of what’s being said in the video. With that in mind, happy viewing!
Translate already published YouTube video
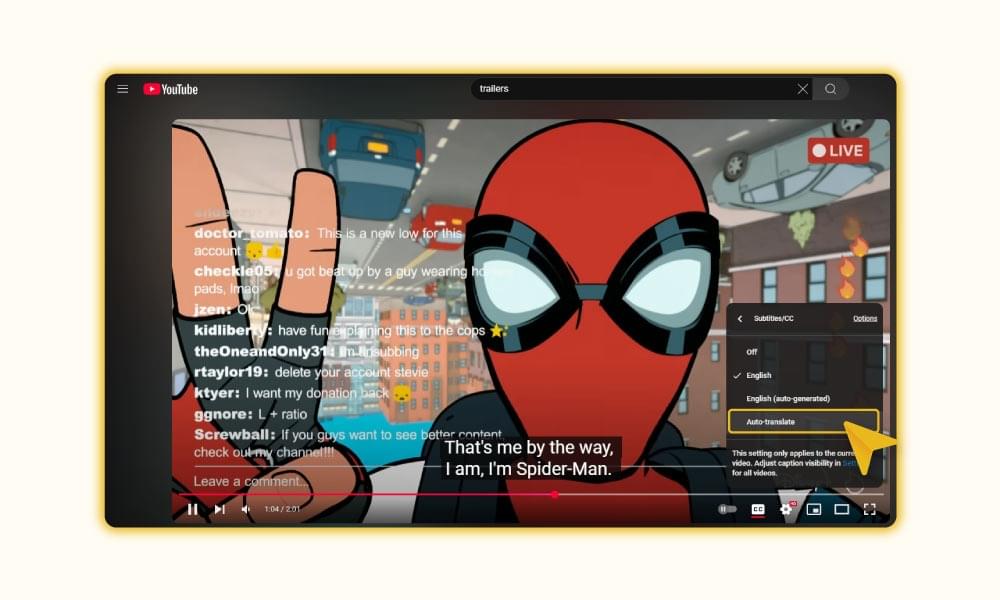
If you want to get the subtitles or want to translate the already uploaded video on YouTube, then following these simple steps will get your work done;
- Step 1: Just play the YouTube video you want subtitles for.
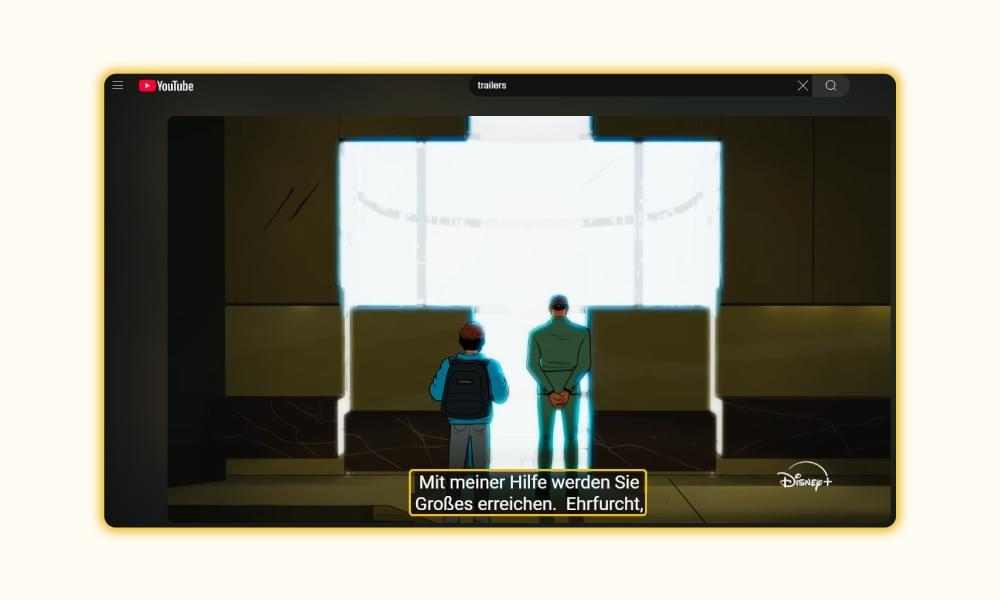
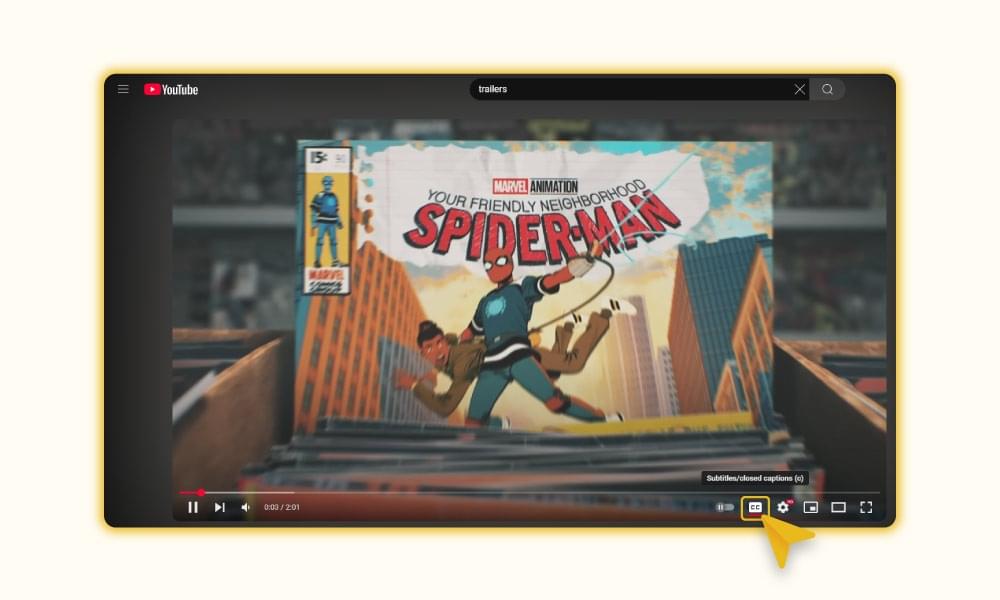
- Step 2: Click on the cc option at the right corner of your screen, and it will start generating the captions.
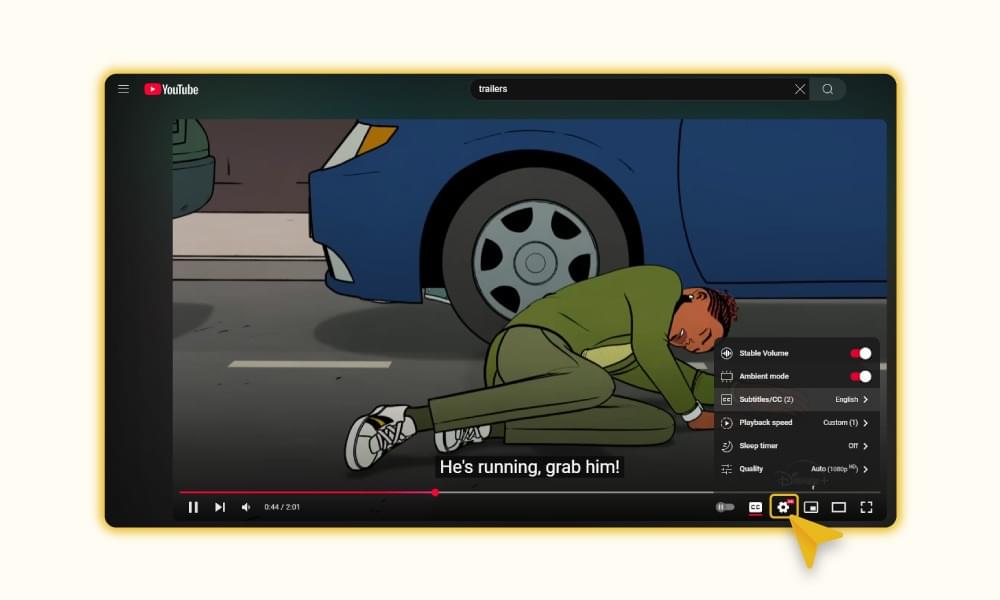
- Step 3: Click on the setting option next to the cc option and select Subtitles/CC (2).
- Step 4: Then select Auto-translate.
- Step 5: In this step, you will have more than 100 languages for translations, choose the one of your choice for your video.
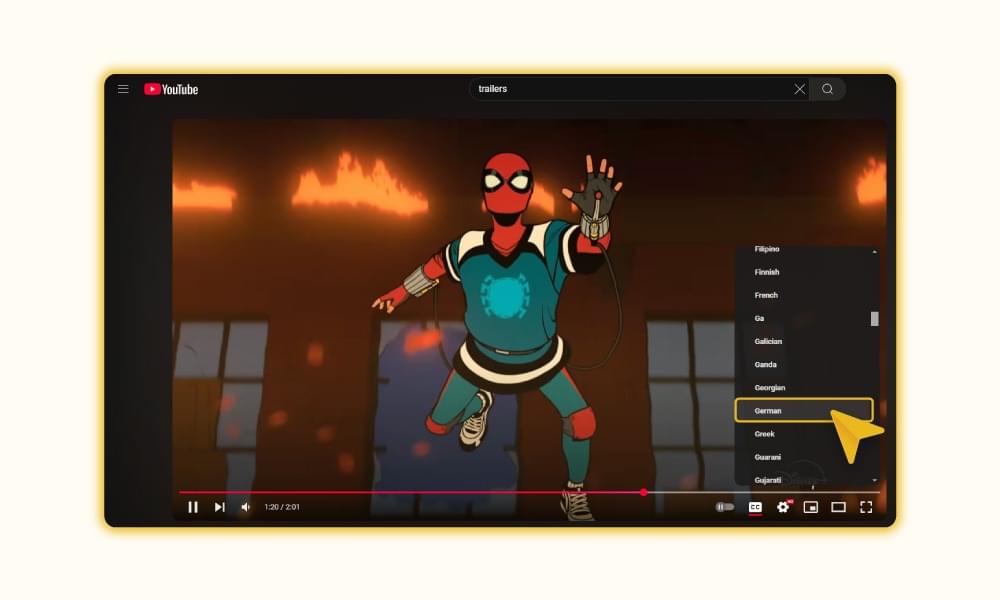
You can use these same steps to turn on auto-translate on your mobile YouTube.
Other Ways to Translate Your YouTube Videos
1. Google auto-translate captions
By using Google auto-translate, YouTube will automatically translate your caption files into multiple languages.
- Upload a short video clip with English audio.
- Selected any language of your choice. For instance, select French as the target language for translation.
- After a few minutes, Google will generate French subtitles for your video. Overall, the accuracy of the translation is good. There can be a few errors here and there, but nothing major.
2. Using a video editor for translating YouTube videos
A video editor can be a helpful tool if you’re looking for a seamless way to add subtitles or captions to your videos.
There are a few things to keep in mind when creating caption files for your videos:
- You’ll need to decide on the text format you want to use. There are several different formats that you can choose from, so it’s important to select one that will work well with the software you’re using.
- Create a file for each language which you want to include subtitles or captions for.
- Then, upload the files to the appropriate location on your website or hosting platform.
- Once you’ve created caption files for your videos, they can be translated into different languages using translation software.
This is another great way to make your videos more accessible to a global audience. If you’re unfamiliar with translation software, plenty of resources are available online to help you get started.
3. View videos with YouTube Transcript
YouTube also offers to view videos with a transcript. The transcript plays along with the video; you can also pick specific lines and jump to that part of the video.
Here’s how to add a transcript:
- Under the video player, select the ellipsis “more” icon (…).
- Choose Open transcript.
- A transcript will pop up on the right-hand side.

Related Read: How to get a transcript of a YouTube video
4. Use online tools to translate YouTube Videos
AI-powered tools to translate YouTube videos are the quickest, most efficient, and money-&-time-savor tools. These tools make translation tasks so fun and easy that publishing videos on YouTube daily is possible.
Online tools to translate YouTube videos mostly come on a monthly subscription base, which may not be costly if you select the plan according to your needs. For instance, third-party translation services charge per word, per minute, or hourly, which can cost you a lot. Furthermore, use the translated content for podcasts, blogs, social media posts, infographics, newsletters, and more.
AI-based translation-generating tools perform multiple tasks with a single click. If you decide on one of these tools for a spin, look deep into features and functions before making a final buying decision.
How to translate YouTube videos with different software?
There are a lot of different caption-generating software programs out there. Some are better than others, but they all have their pros and cons. Here is a breakdown of some of the more popular ones:
1- Adobe Premiere Pro:
Adobe Premiere Pro is a powerful video editing software that enables users to create professional-grade videos. One of the most useful features of Adobe Premiere Pro is its captioning tool. This tool allows users to add captions to their videos, making them more accessible to deaf or hard-of-hearing viewers.
Adding captions to a video in Adobe Premiere Pro is easy.
- Select the “Caption” option from the “Add Title” menu,
- Then, type your text into the caption box.
- You can also customize the appearance of your captions by changing the font, size, color, and position.
- You can increase the opacity or add a drop shadow effect to make your captions more visible. You can also animate your captions to appear on-screen when you want them to.
2- Final Cut Pro:
It’s a tool by Apple and has many of the same features as Adobe Premiere Pro. Here is how you can translate your YouTube videos on Cut Pro
- First, open Final Cut Pro and import your desired YouTube video.
- Then go to the timeline, select your video and click on “Captions” and add captions in the original language.
- Select the language from the sub-menu on Final Cut Pro
- then use a translation tool to translate the captions into the language of your choice.
- Save and export your video with translated captions Here
Another great feature in Final Cut Pro is its support for 4K video. This means that you can take full advantage of all those extra pixels! If you’re shooting footage in 4K, you’ll be able to edit it natively in Final Cut Pro without having to downscale it first.
3- iMovie:
This tool is good for adding captions to videos if you’re on a budget. It’s not as feature-rich as the other two options, but it’s still fairly user-friendly and shouldn’t be too difficult to learn. iMovie is a great video editing tool for Mac users.
Adding captions to your iMovie videos is easy.
- First, open your video in iMovie and select the “Captions” tab at the top of the screen.
- Then, click on the “Add Caption” button and choose the language you want to use for your captions.
- Once you’ve added your caption, you can edit it by clicking on the “Edit” button.
- Here, you can change the font, size, color, and position of your caption. You can add additional text or images to your caption by clicking on the “+” button.
- When you’re finished editing your caption, click on the “Done” button and then save your video.
It’s a wrap-up:
Translating YouTube videos via the auto-translation method is good, but it’s not the ultimate answer to promoting your brand’s valuable message. Therefore, the experts recommend caption-translation tools to get multi-dimensional benefits at lower prices.
Translating YouTube videos has become a one-click phenomenon with more accuracy, customization, creativity, and accessibility features. But with caption-generating tools like subtitleBee, it has become a more hassle-free job than ever.
You can also repurpose videos into blogs, podcasts, social media posts, infographics, and newsletters. Adding translated captions can engage more audiences, enhancing the watching experience even for people suffering from different types of disabilities. Therefore, gaining more traffic and conversions from different sources is possible with the help of YouTube video translations.
Related Read:
Vlog Audience Building: Tips to Grow Your YouTube
How to share YouTube video on Instagram
How YouTubers make money
Add and translate your subtitles to more than 100 languages with high accuracy


